eek! halloween softies!

Looking for some fast, fun, and easy Halloween projects? How about three! These little felt friends are quick to make, and loads of fun!

halloween felt softies

These guys are equally great as decorations or toys. My nephew was particularly fond of the bat (he has crinkle material in his wings!). I love the idea of a bowl full of the candy corns as party favors. And the eyeballs are just begging to be made into a throw pillow! Really, the possibilities are endless.

Ready to make your own set of Halloween friends? Follow the links below for full tutorials and patterns.

Eyeball Softie Pattern  Candy Corn Softie Pattern  Vampire Bat Softie Pattern

Happy Haunting!

xoxo

flax seed comfort pack

I’ve been wanting to make a heat/cold pack for a while. Once I realized how fast and easy it was, I wish I would have done it sooner! These are perfect for soothing aching muscles, cooling relief for fevers or keeping warm on a chilly night… And they make great gifts!

comfort pack 1

These look so much nicer than any store-bought heat/cold packs I’ve seen. The other great thing is you can customize the size depending on intended use.

comfort pack 3

There are a number of various tutorials out there for heat packs. I used the one I found on fellow fellow as a starting reference.

Materials:

  • cotton fabric
  • thread
  • flax seeds (I used about 4 cups)
  • funnel
  • basic sewing materials (machine, pins, scissors, etc.)

comfort pack materials

Step 1:  cut your fabric to your desired size. I cut mine into two 18” x 7.5” strips (finished size is approximately 15.75″ x 5.75″ x .75″). Place right sides together, and pin. Sew around using a 5/8” seam allowance, leaving a small opening at one end for turning and filling. Don’t forget to back stitch at the beginning and end.

comfort pack step1

Step 2:  trim your corners and turn right side out. Iron flat.

comfort pack step2

Step 3:  mark your sections. I started from the center and worked my way out, making 6 sections that are approximately 2 3/4” each.

comfort pack step3

Step 4:  sew your dividing lines. Be sure to stop each line at least 1” from the sides. You’ll need these gaps to move the flax seeds from section to section. The smaller the gap, the harder it will be to fill.

comfort pack step4a

optional:  you can run a top stitch around the edge to give it a nice finished look. Just make sure to leave your gap open for filling.

comfort pack step4b

Step 5:  use a funnel to fill your bag with flax seeds. Pour in a little at a time and work it down to the bottom section, then the next one and so on, until it’s as full as you’d like.

comfort pack step5

Step 6:  stitch your opening closed and then complete the top stitching. Trim your threads and you’re all done!

comfort pack step6

Keep your comfort pack in the freezer for cooling relief, or microwave it for warm relief.

Warming instructions:  warm in microwave for 45 seconds to 1 minute. Shake and microwave another 20 to 30 seconds until desired temperature is reached. (Depending on your microwave, you may need to adjust these times). Take care removing your pack from the microwave as it may be hot.

*Do not leave your comfort pack in the microwave unattended! And do not overheat your comfort pack, as this could cause the flax seeds to scorch.

comfort pack 2

Looks pretty cozy, huh? Enjoy!

xoxo

color pop quilted stockings

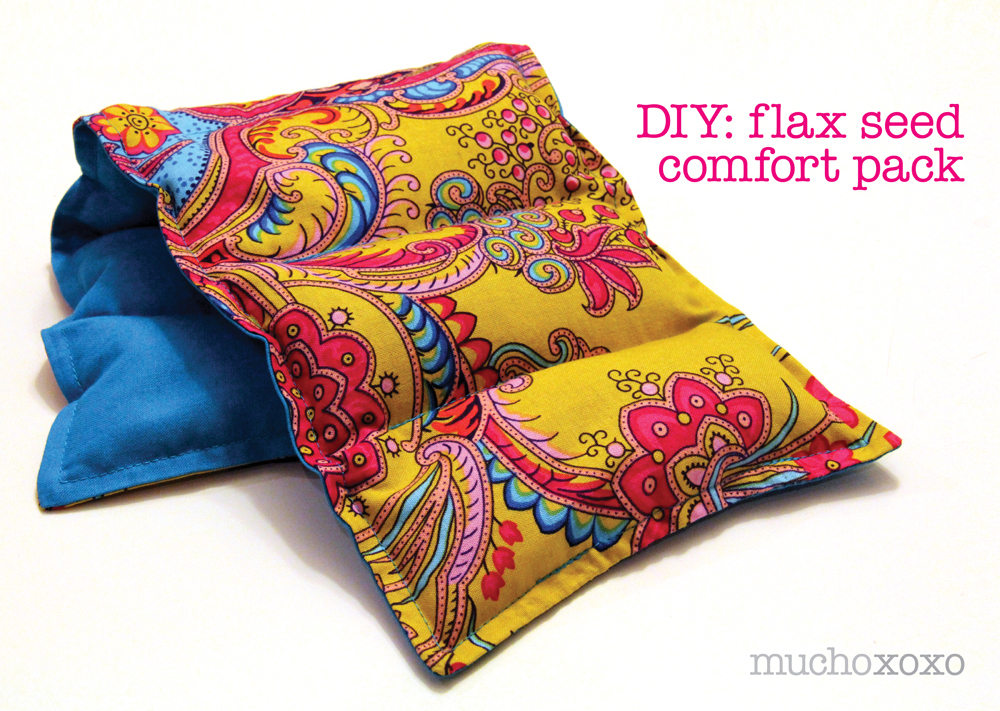
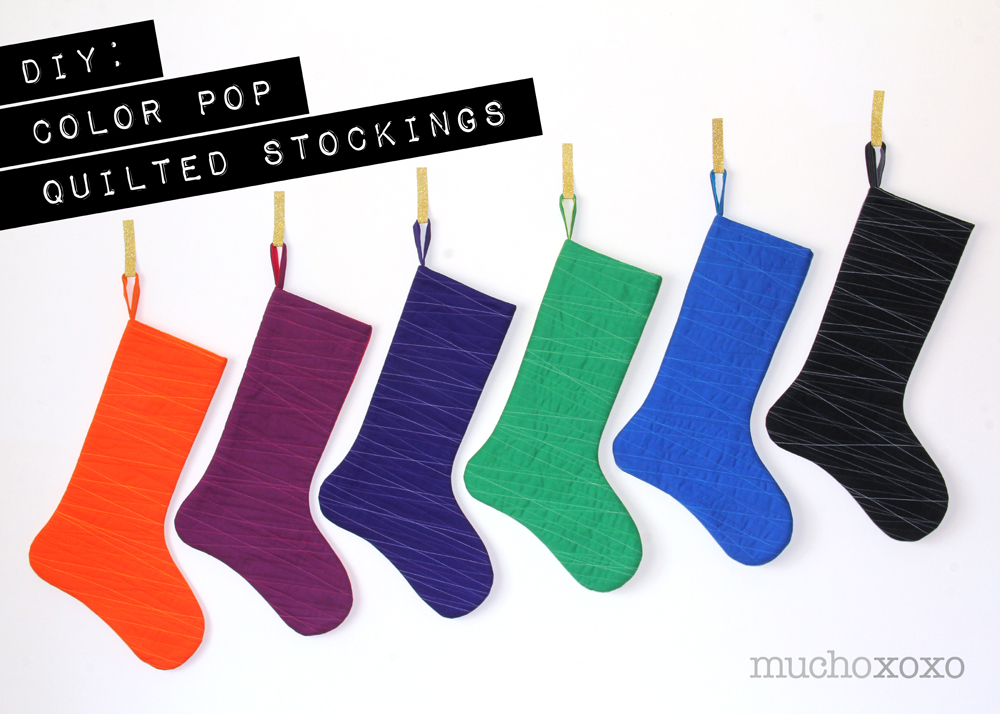
Christmas is coming, it’s time to get into the holiday spirit! Why not add a little pop of color to your decorations with these candy-colored stockings!

Color Pop Stocking

My family is pretty big on stockings. We’ve had an odd assortment over the years, some made by mom, some store-bought. So with the addition of my awesome little nephew to the family last year, it was the perfect opportunity to make a new one, not just for him but for everyone. I knew I wanted something fun, non-traditional, and of course, easy to do (I was making 6). I decided to use a technique that I absolutely love for quilts. It’s pretty straight-forward and just takes a little patience.

The great thing about these stockings is how versatile they are. I chose jewel tones for ours, but you could also go with more traditional holiday or winter color schemes as well. The options are endless.
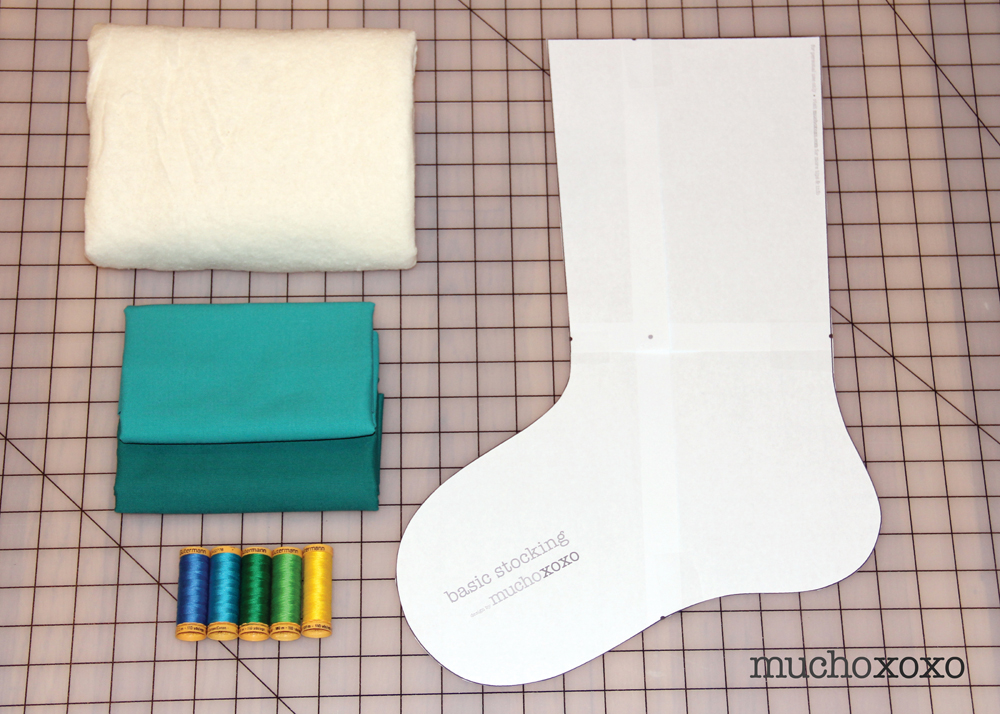
Materials:

  • exterior fabric – approx. 1/2 yard per stocking
  • lining fabric – approx. 1/2 yard per stocking
  • coordinating/contrasting thread in a variety of colors (I used 5)
  • batting
  • basic sewing materials (machine, pins, scissors, etc.)
  • basic stocking pattern (available here)

Stocking Materials

Step 1:  print your pattern (make sure printer is set to 100%, not fit to page). Line up pages where indicated and tape together. Cut out the paper stocking and set aside.

If you want to pre-wash your fabrics, do that now. I chose not to. Just keep in mind that if you don’t, your stockings will shrink if/when you wash them.

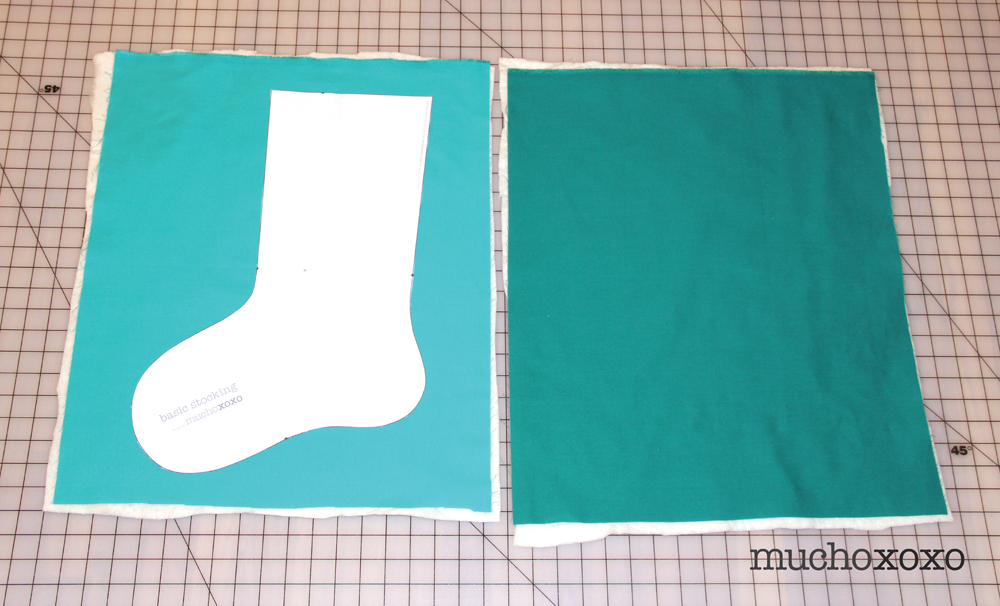
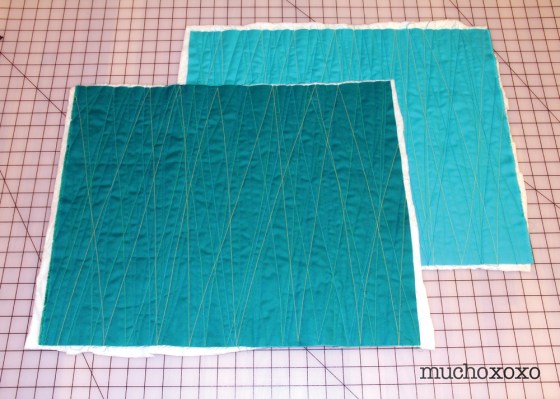
Step 2:  quilt your exterior pieces. You’re going to do this BEFORE you cut them out. I was working with approximately 1/2 yard pieces of fabric, so I simply cut them in half. But you can really make them whatever size you want, as long as it’s larger than the stocking. As you can see from the image below, I’m working with a piece that is larger than I need. I’ll use my leftover quilted fabric for other projects (more about that later).

Stocking Pattern Piece

Cut your batting to size with your exterior pieces and pin-baste together in a few spots.

I opted not to trace my stocking onto my fabric before I quilted. I kind of like being surprised. And since I will use the leftover fabric, I just want to quilt the whole thing evenly. If you’re going to trace the stocking onto the fabric, don’t forget to flip it on one so you have mirror images.

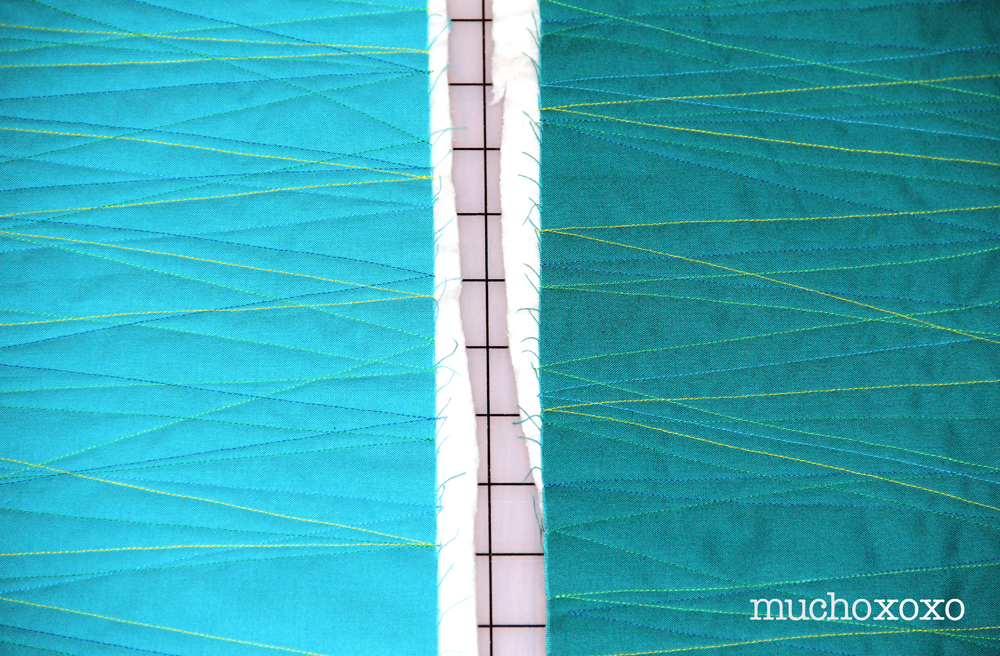
Now it’s time to sew! If you have a walking foot, break that baby out now.

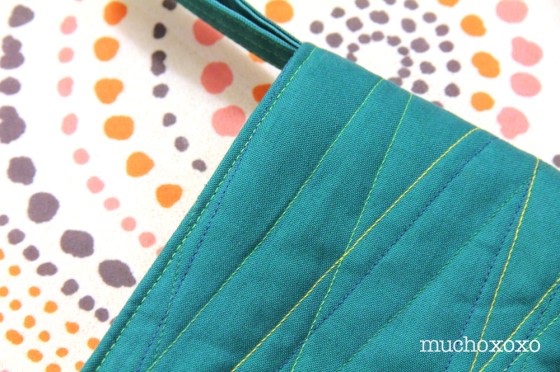
Choose your first thread color. You’re just going to make your way back and forth at a slight angle across the length of the fabric. When you get to the end, work your way back across. Repeat on your second exterior piece. Change your thread color and repeat. Continue until you’re happy with how it looks.

Stocking Quilt Detail

This is my favorite part. It’s also the most time-consuming step. With all of the back and forth and changing threads, it can get a little tedious (try making a whole quilt this way!), but the end result is totally worth it.

Stocking Quilted

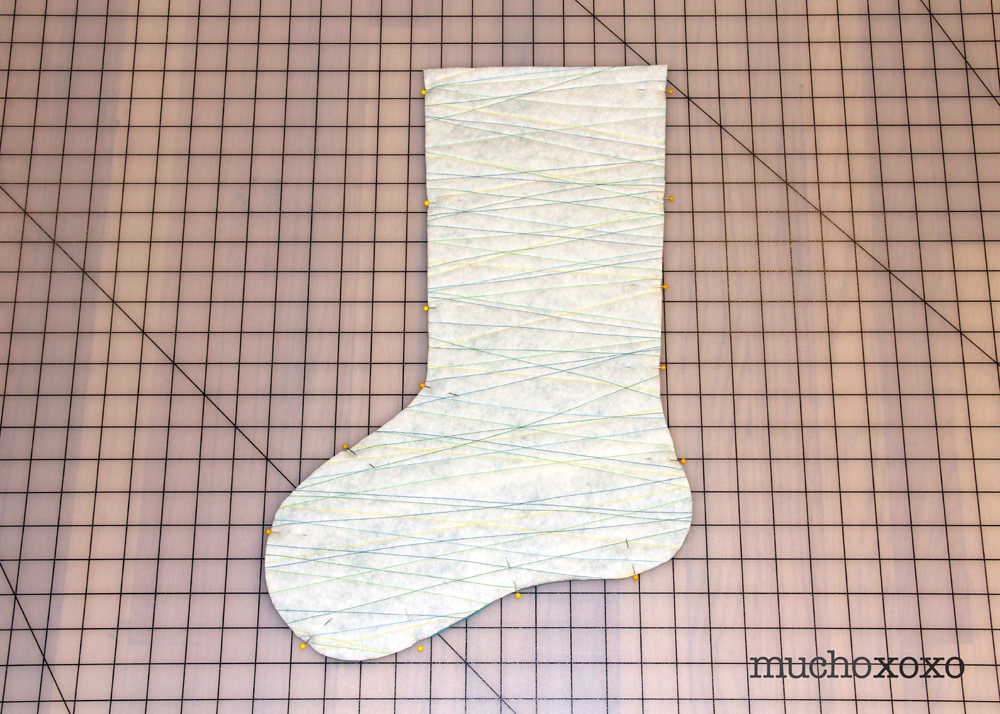
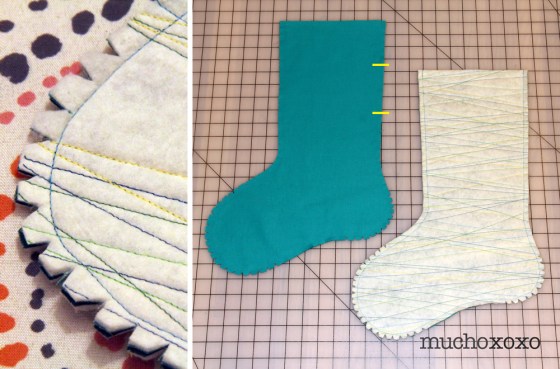
Step 3:  cut your pieces. If you have good scissors, you can cut your exterior pieces at once, but that’s up to you. If you’re going to cut them at once, place them right sides together and trace your stocking. I used a few pins to hold the pieces together while I cut. If you’re going to cut them one at a time, don’t forget to flip your pattern! You want your exterior pieces to be mirror images of each other once they’re cut.

Stocking Pieces

Place your exterior pieces right-sides together and pin. Set aside.

Stocking Pinned

Repeat these steps with your lining fabric.

Step 4:  sew your exterior pieces together. Using a 3/8” seam allowance, sew around your stocking, leaving the top open. Don’t forget to backstitch at the beginning and end.

Repeat this step for your interior fabric, but make sure to leave a 3-4” opening in one side for turning (indicated below).

Trim your fabric and clip/notch your curves where needed.

Stocking Cut Trim

Turn your exterior piece right-side out and set both stocking pieces aside.

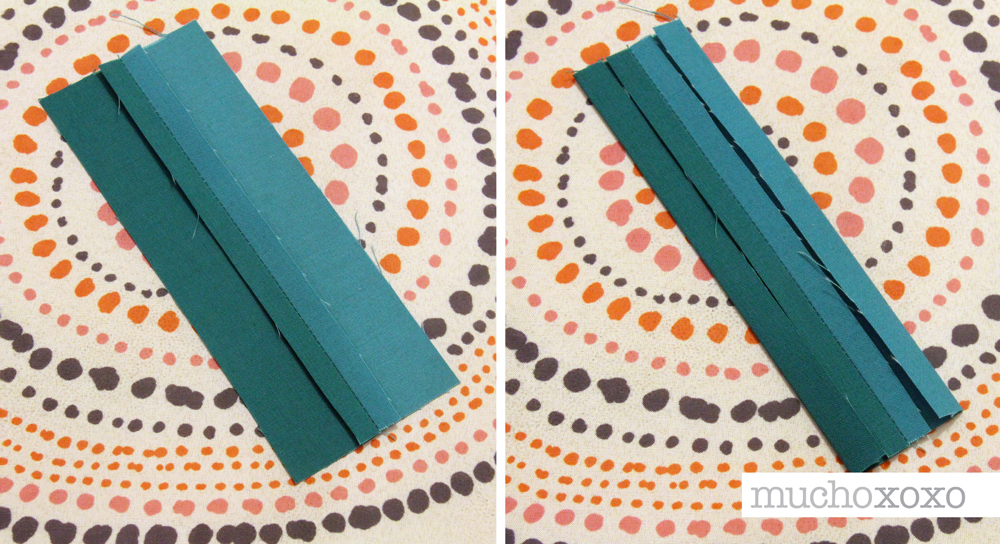
Step 5:  make your hanging loop. Cut two strips of fabric to 1 3/4” x 7” and place right-sides together.  Stitch down one side with a 3/8” seam allowance. Iron open. Press each raw edge in towards the center to line it up with the interior raw edge.

Stocking Loop 1

Fold in half and iron (finished size will be approximately 3/4” x 7”). Stitch down each side, close to the edge, then again down the center.

Stocking Loop 2

Fold the strip in half to create your loop and press again. If you want, you can stitch the loop closed. This helps keep it from slipping while sewing.

Stocking Loop 3

Step 6:  attach your hanging loop. Line up the raw edges of the loop and stocking and center on the back seam and pin into place.

Stocking Loop Pin

Use a 1/4” seam allowance to attach your loop. Go back and forth a few times to reinforce this.

Stocking Loop Sewn

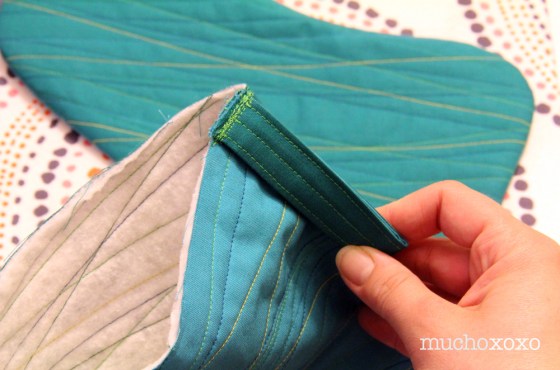
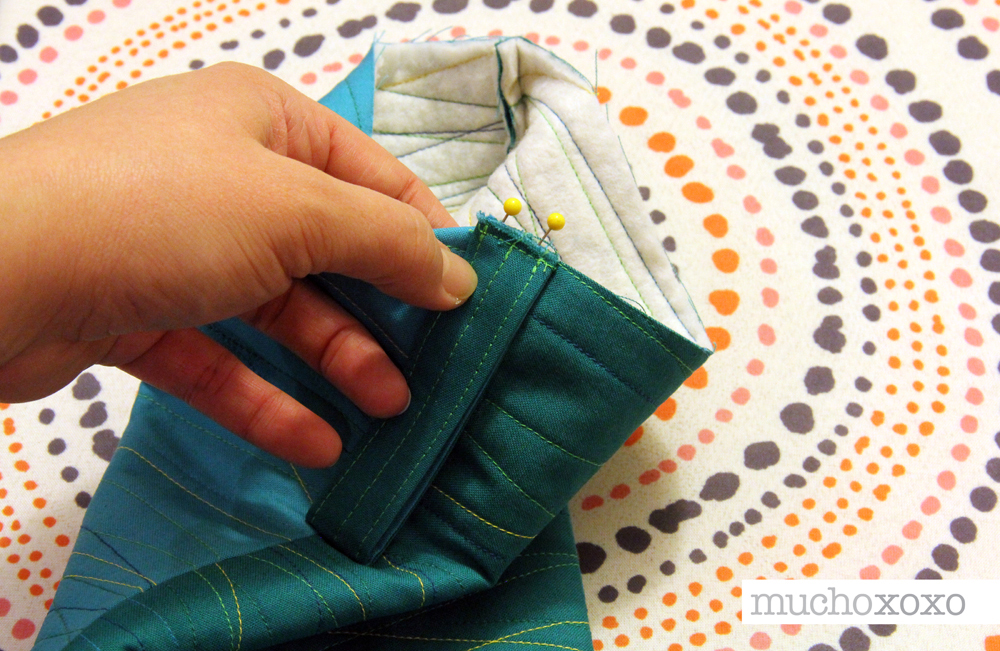
Step 7:  attach your lining and exterior pieces. With your lining inside-out, and your exterior fabric right–side out, tuck the exterior into the lining.

Stocking Step 7

Line up your seams and raw edges and pin into place.

Stocking Step 7b

Sew all the way around with a 1/2” seam allowance. I would recommend backstitching over the loop again once or twice to reinforce it.

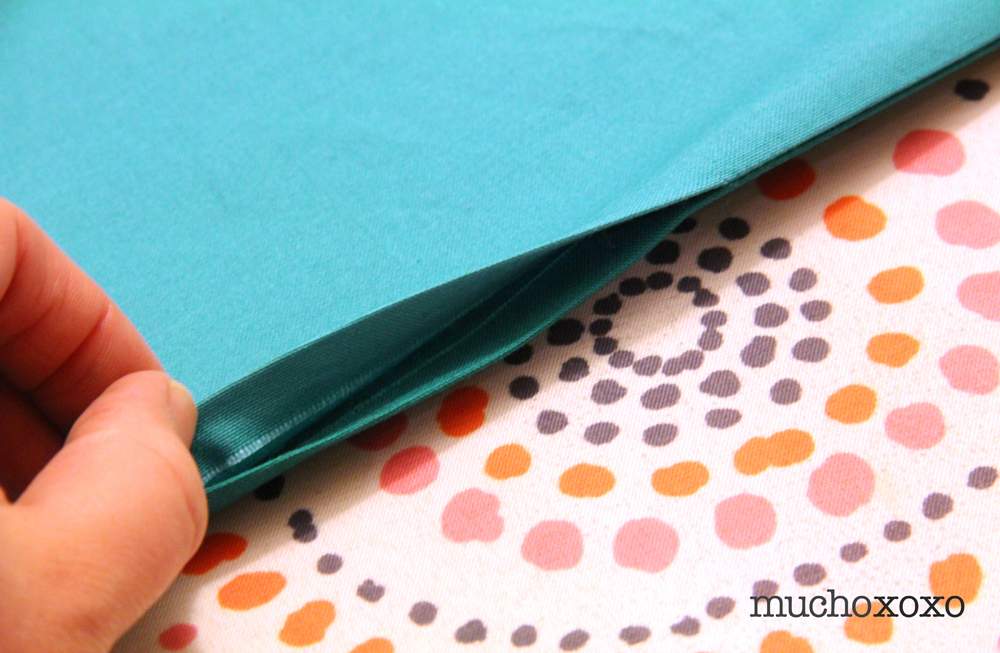
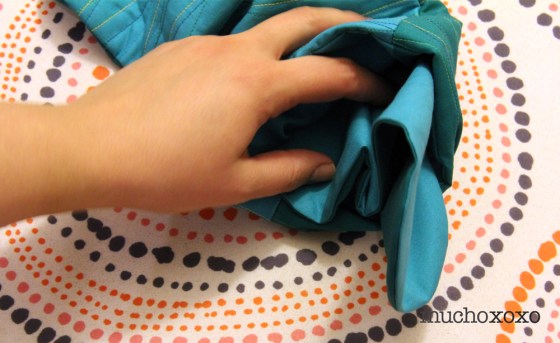
Step 8: use the opening in the lining to turn your piece right side out. You’ll end up with the exterior fabric and lining pointing away from each other.

Stocking Turned

Iron your opening and then stitch closed. I hand stitched mine closed but you can do this on the machine if you prefer.

Stocking Opening

Step 9:  push the lining into the stocking and smooth out your fabric.

Stocking Lining

Iron your stocking. Top-stitch around the top edge to finish it off.

Stocking Top Stitch

And you’re done! Hang your stocking and enjoy!

Stocking Details

Have a colorful Christmas!

Stocking Colors

xoxo

vampire bat softie

Halloween is tomorrow (ahhhhh!), but this vampire bat softie was just too cute not to share!

BatSoftie_gifs1

This little guy is fairly easy to put together, and makes a great toy or decoration. And adding crinkle material in the wings makes it even more fun!

Materials:

  • black/red felt for body and pupils
  • white felt for eyes and fangs
  • coordinating embroidery thread
  • stuffing
  • crinkle material (optional)
  • basic sewing supplies (machine, needle, scissors, pins, etc)
  • pattern (available here)
materials

* I used two different shades of red, just for the purpose of this tutorial.

Unlike the eyeball and candy corn softies, I did most of my assembling for this on the sewing machine.

Step 1:  print and cut your pattern, then cut your felt pieces. I’d recommend cutting both body pieces at the same time, as well as each pair of wings.

Step 2:  place your wings right sides together and pin (if you cut them at the same time, you can just leave them as is and pin).

batsteps1

Step 3:  sew each pair of wings, leaving the straight end open for turning. Remember to back stitch and the beginning and end.

Step 4:  trim your corners and clip/notch your curves.

batsteps2

Step 5:  turn your wings right side out. It’s a bit of a tight squeeze so take your time. You can use a chopstick to help with the corners.

batsteps3

Step 6:  iron the wings and then topstitch. Again, leave the straight end open.

Step 7:  stuff each wing with a small amount of crinkle material (optional). You can use a chopstick so make sure it’s spread evenly and reaches the tips.

batsteps4

Set the wings aside and move on to the body.

Step 8:  sew your face to the front body piece. I placed my eyes first and then drew my mouth with disappearing ink and used a simple back stitch.

batsteps5

Step 9:  once you’ve finished the face, you’re ready to assemble. I would recommend stitching the ears and wings into place. I did this on the machine with a larger stitch, as close to the edge as I could get (indicated by the dotted lines below). This will ensure that nothing moves around while you’re sewing the body.

batsteps6

Step 10:  time to pin! Fold in your wings so they are as compact as you can get them. Pin all around. Where the wings stick out will be your opening for turning and stuffing.

batsteps7

Step 11:  sew the body. Don’t forget to back stitch at the beginning and end. I also backstitched over the edges of the wings, just to reinforce them. Trim your wing excess and clip your curves when you’re finished.

batsteps8

Step 12:  turn your bat right side out.  I’ve found that if you hold the opening with one hand and gently tug the wings with the other, it will start to turn fairly easily. Once it’s right side out, give the ears and wings a little tug to make sure they’re fully out.

Step 13:  stuff with crinkle material (optional) and stuffing. Use small pieces of stuffing to ensure you get it nice and full.

batsteps9

Step 14:  when you’re done stuffing, close up your opening with a ladder stitch. If you’re unfamiliar with the ladder stitch or need a refresher, check out this great tutorial with very clear step-by-step instructions. You may want to add a bit more stuffing as you close the opening. Once you’ve reached your starting point, tie it off, bury your thread and trim. And that’s it! A little vampire bat buddy to keep you company!

batsteps10

So much cuter than the real thing, huh?

BatSoftie_gifs2

Have a Happy Halloween!

xoxo

candy corn softie

It’s just not Halloween without candy corn! Here’s another fun project that comes together in a flash.

CandyCornCandy_loop2

These make great decorations, or you can add some crinkle material and a rattle insert for a fun toy for your little one! These would also be a fun addition to the kids’ table on Thanksgiving.

Materials:

  • white felt
  • orange felt
  • yellow felt
  • black felt
  • coordinating embroidery thread
  • stuffing
  • crinkle material (optional)
  • rattle insert (optional)
  • interfacing (optional)
  • basic sewing supplies (needle, scissors, pins, etc)
  • pattern (available here)

CandyCorn_materials

This is a fast and easy project that can be done by hand or on the machine.

Step 1:  print and cut your pattern and then cut your felt pieces.

Step 2:  sew your white/orange/yellow strips together. I used the solid back piece as a guide for lining up my strips (shown below left). I did this step on the machine, sewing fairly close to the edge. Since I will be hand stitching the rest, I chose not to backstitch at the end of each row. Instead, I pulled the thread through to the back and tied it off.

CandyCornSoftie_Steps1

Step 3:  sew your face to the assembled front piece. If you decide to make more than one, consider giving them all slightly different expressions. (btw, they’re also pretty cute without a face).

CandyCornSoftie_Steps2

CandyCornHowTo_loop

Step 4:  if you choose to add interfacing, now’s the time (I used Pellon Shape Flex). I would recommend this step especially if you plan to hand stitch your pieces. It adds a little reinforcement to the felt. I opted to iron and trim it after I sewed the strips together and added the face. It covers up the stitching and fabric flaps nicely so you won’t have to worry about snagging it when you add the stuffing. And the blanket stitch does a great job of hiding your edges, in case you’re worried about the interfacing showing.

Step 5:  once you’re happy with the look of your face, place your finished front piece on top of the back piece, wrong sides together, and pin.

CandyCornSoftie_Steps3

Step 6:  blanket stitch your pieces together, leaving a 2” opening. If you’re unfamiliar with the blanket stitch or need a refresher, check out this great project with very clear step-by-step instructions. The blanket stitch uses a surprising amount of thread and can vary greatly depending on how close you place your stitches, so be prepared!

Step 7:  stuff with crinkle material (optional) and stuffing. Use small pieces of stuffing to ensure you get it nice and full.

CandyCornSoftie_Steps4

If you choose to add a rattle insert, try to place it towards the center. Not sure where to purchase crinkle material or rattle inserts? I get mine here.

Step 8:  when you’re done stuffing, continue your blanket stitch to close up the opening. You may want to add a bit more stuffing as you close the opening. Once you’ve reached your starting point, tie it off, bury your thread and trim.

CandyCornSoftie_Steps5

And that’s it, a candy corn buddy that’s good enough to eat!

CandyCorn_hero2xoxo

halloween eyeball softie

Halloween is quickly approaching (eek!), so I decided to get into the spirit with some fun and easy felt projects. First up, a big eyeball!

EyeballSoftie1

These make great decorations, or you can add some crinkle material and a rattle insert for a fun and [not too] spooky toy for a little one!

Materials:

  • white felt for eyeball and highlight
  • black felt for pupil
  • colored felt for iris
  • coordinating embroidery thread
  • stuffing
  • crinkle material (optional)
  • rattle insert (optional)
  • interfacing (optional)
  • basic sewing supplies (needle, scissors, pins, etc)
  • pattern (available here)

Eyeball_materials

This guy comes together in a cinch. I did everything by hand but it could easily be done on the machine. These directions are for the hand sewn version

Step 1:  print and cut your pattern and then cut your felt pieces. (2 large white circles for eyeball, 1 colored circle for iris, 1 black circle for pupil and 1 very small white circle for the highlight). If you’re going to use crinkle material, cut it slightly smaller than the large circle.

Step 2:  attach the iris, pupil and highlight to one of the large white circles with embroidery thread. I chose a contrasting color to stand out against the green (reminds me of a poisonous frog). The color combos are endless, so have fun with it! Optional – you can add red stitching radiating in from the edges to make the eye look bloodshot.

EyeballSoftie_Step1

Step 3:  if you choose to add interfacing, now’s the time (I used Pellon Shape Flex). I would recommend this step especially if you plan to hand stitch your pieces. It adds a little reinforcement to the felt. I opted to iron and trim it after I sewed the iris/pupil/highlight. It covers up the stitching nicely (shown below right) and you won’t have to worry about snagging it when you add the stuffing. And the blanket stitch does a great job of hiding your edges, in case you’re worried about the interfacing showing.

EyeballSoftie_Step2

Step 4:  once you’re happy with the look of your eye, place your finished front piece on top of the second white circle, wrong sides together, and pin.

Step 5:  blanket stitch your pieces together, leaving a 2” opening. I used red embroidery thread to make it look a little bloodshot. If you’re unfamiliar with the blanket stitch or need a refresher, check out this great project with very clear step-by-step instructions. The blanket stitch uses a surprising amount of thread and can vary greatly depending on how close you place your stitches, so be prepared!

EyeballSoftie_Step3

Step 6:  stuff with crinkle material (optional) and stuffing. Use small pieces of stuffing to ensure you get it nice and full.

EyeballSoftie_Step4

If you choose to add a rattle insert, try to place it towards the center. Not sure where to purchase crinkle material or rattle inserts? I get mine here.

EyeballSoftie_Step5

Step 7:  when you’re done stuffing, continue your blanket stitch to close up the opening. You may want to add a bit more stuffing as you close the opening. Once you’ve reached your starting point, tie it off, bury your thread and trim.

EyeballSoftie_Step6

And that’s it, a spooky eyeball of your very own!

Eyeball Softies

Couldn’t be easier, right? Go ahead, make a bunch!

Happy haunting!

xoxo