orange peel quilt-a-long: appliqué

orange peel qal

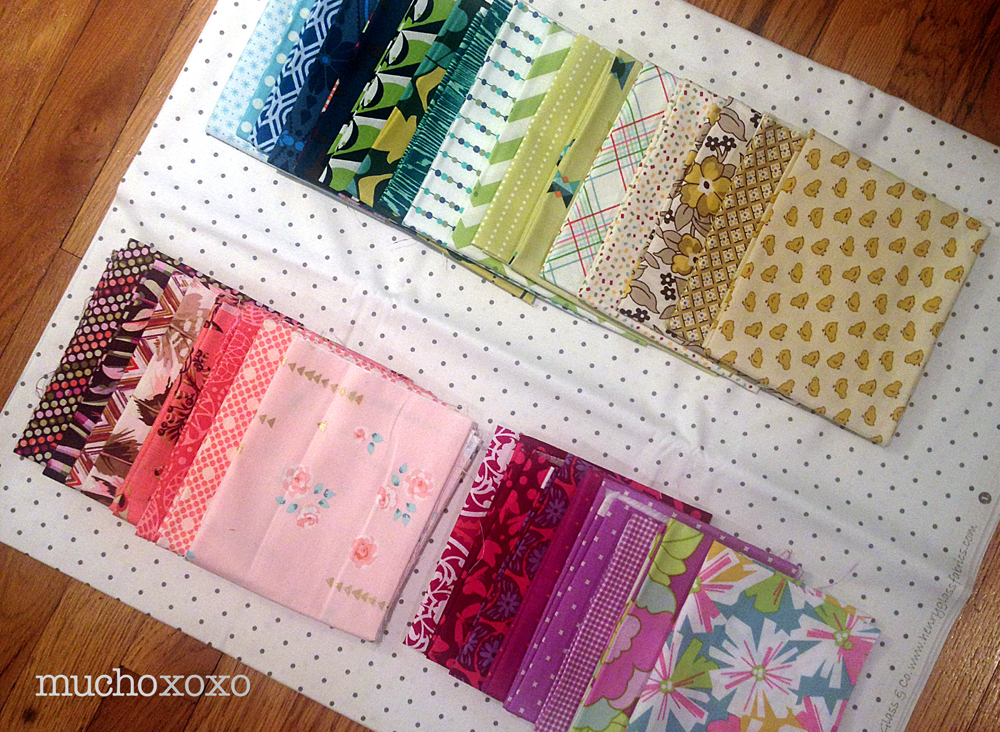
It’s time for another Orange Peel Quilt-A-Long update! I’ve made a lot of progress since my last check-in, and have definitely found my groove with this project. Once I figured out my basting technique, finishing the rest of the peels was fairly easy. So with a big batch of peels basted and a nice stack of backing fabric good to go, I was ready to attempt my very first appliqué!

OrangePeelQAL_ready

Again, I struggled a little in the beginning. But I found my rhythm and a method that works for me, and I just kept going. I found that my peels sat flatter on my backing and were easier to hold while stitching if I used slightly bent pins. Not necessary by any means, this is just what worked for me.

OrangePeelQAL_pinned

I strayed a little from Julie’s appliqué instructions and did what I’m calling a modified ladder stitch. Traditional appliqué has you come straight up through the back and catch a few threads at the edge of your piece. I had a very hard time with this! I felt uncoordinated and sloppy. So instead, I came in at a slight angle, went out through the fold/corner, and straight down to the back.

Orange Peel QAL stitching

(I did a slightly exaggerated angle here so it was easier to see)

For me, this method was much easier. And the paranoid quilter in me feels like this will be more durable in the case of regular use and multiple washings.

Orange Peel QAL progress

So that’s where I’m at! I’m still not exactly sure what size this is going to end up. Right now I’m just making peels and enjoying the process… I’ll run out of backing fabric soon, and then I guess I’ll know I’m done! Then it will be time to choose my layout and trim blocks :)

Stay tuned for more Orange Peel QAL fun. And in the meantime, hop on over to button-button and take a look at everyone’s progress! You can also take a peek on Instagram by searching #orangepeelqal2014.

xoxo

orange peel quilt-a-long: fabric + prep

orange peel qal

Things definitely got off to a slow start with my orange peel quilt (too many projects going at once, maybe?) but I’ve made up for lost time and I’m back on track! Let’s start at the beginning, shall we?

The first task was pulling fabric. My only rule (as always) was that I had to pull from my stash. I knew I wanted to use color, and lots of it. So, I finally decided to go for scrappy/random peels in a range of colors on a neutral low-volume backing. Now, my stash has plenty of colors and bold prints, but neutral? I hardly have any! I did have a fun grey polka dot fabric that I’ve been wanting to use, so I decided to go with a uniform backing for the peels.

OrangePeelQAL fabric

This is my first fabric pull, and I’ve since continued to add to it from my stash.

In the spirit of catching up (and planning ahead for being without my sewing machine for a few days), I cut 30+ freezer paper peels so I could just go go go! I went ahead and started ironing them to the fabrics I pulled. I decided to only do one peel per print, no repeats.

OrangePeelQAL ironed

Then it was time to baste. I tried one… And, wow! It was a complete disaster! It was SO bad… This was my first time working with freezer paper, and I clearly didn’t iron it long enough. So before I was even half way through basting, the freezer paper started to release from the fabric and slide around. It makes it almost impossible to get a good grip on the fabric. No bueno.

(This is where the picture of my failed basting attempt would go, but it was so epically bad that I immediately threw it away. Yes, it was really that bad.)

Honestly, it was a little discouraging. But I was determined to keep going. Don’t let one bad peel ruin the whole bunch, right? I re-ironed all the peels to make sure the freezer paper had a nice strong hold. And I was ready to give it another go. It took a few peels to figure out a method that worked for me, but once I did they went pretty fast. Phew!

OrangePeelQAL basted

One thing I did in addition to Julie’s basting instructions that I found very helpful was to quickly finger-press the peels before sewing.

OrangePeelQAL fingerpress

It creates a nice crisp fold and made the sewing go much quicker for me.

Orange Peel QAL detail

Next up, appliqué! More on that very soon, so stay tuned. In the meantime, hop on over to button-button and take a look at everyone’s progress. You can also take a peek on Instagram by searching #orangepeelqal2014.

Have a great week!

xoxo

orange peel quilt-a-long

Well, I had so much fun with the last QAL that I’m jumping in on another! This one is for the orange peel quilt-a-long, hosted by Julie of button-button.

orange peel qal

In keeping with pushing myself to try new things, this project definitely fits the bill. The technique we will be using to make the orange peels is all hand-stitched appliqué. I’m a little afraid of anything involving hand stitching so this will be a challenge. But I’m looking forward to learning something new!

If you’ve been tempted to join in on a quilt-a-long but have been worried about feeling rushed, this might just be the perfect one for you! The plan is to go at a nice easy pace. You can also pick your project size based on how much time you think you’ll have. Better yet, you don’t really even have to decide on a finished size to get started, since you make one block at a time. I’m planning on doing a lap-sized quilt, but this would be fantastic as a mini or even a cushion.

Head over to button-button for all the details. Julie has also posted about materials and fabric choices here to get everyone started. I’m still a little stumped about fabrics, but reading her post definitely gave me some ideas.

I’ll be sharing my progress along the way, here as well as on instagram, so stay tuned for more!

Have a fantastic weekend :)

xoxo