100 quilts for kids 2014

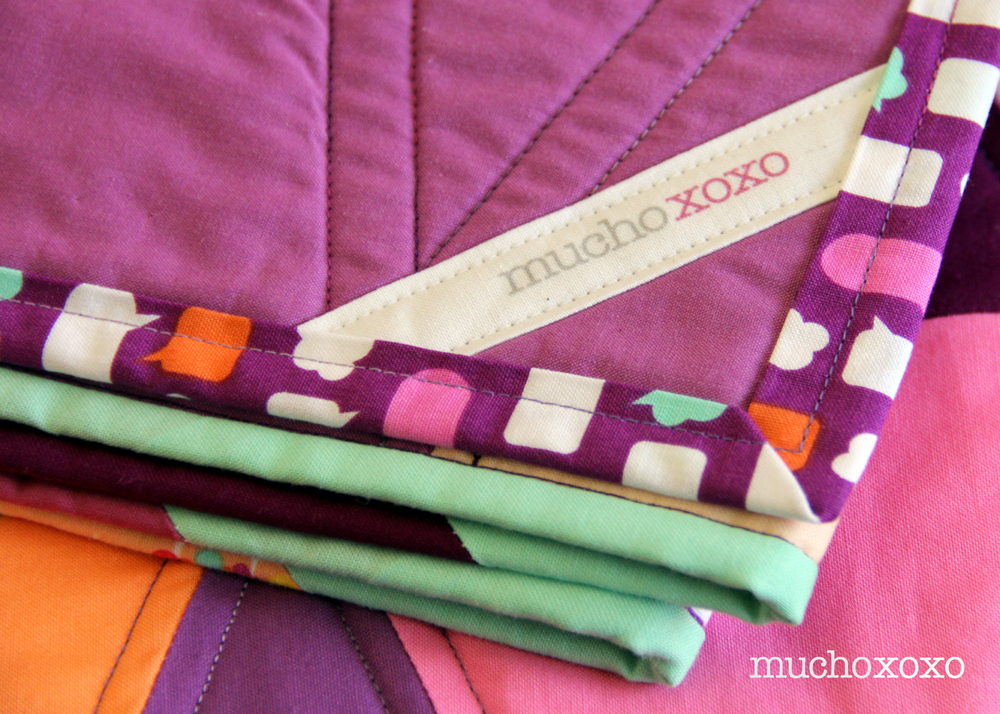
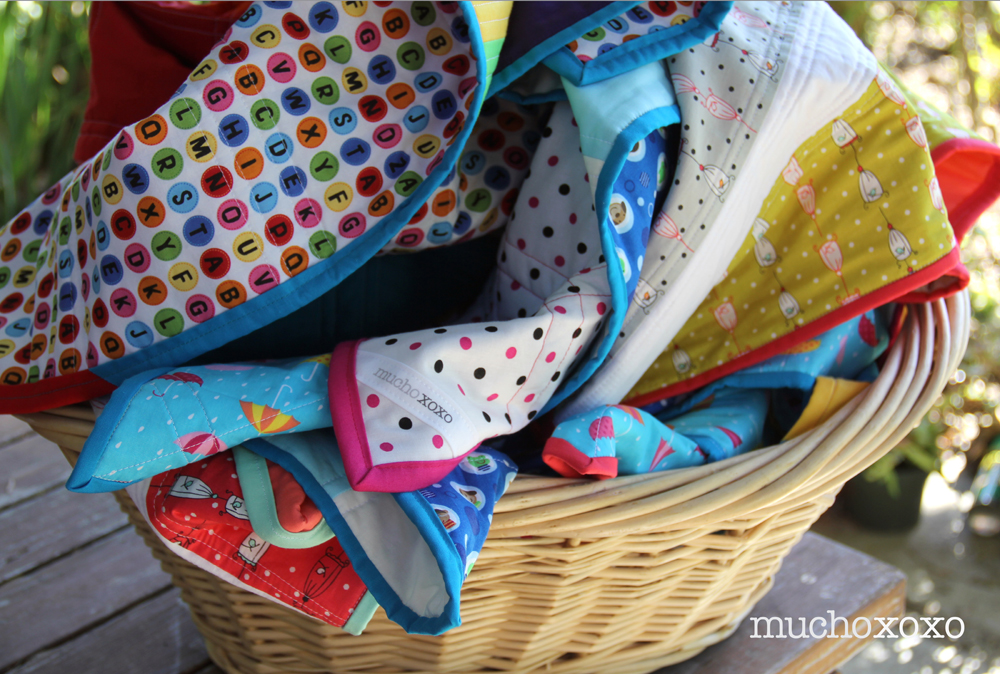
100 Quilts for Kids wrapped up last week, and now that I’ve had a moment to breathe, it’s time to share!

100 quilts for kids

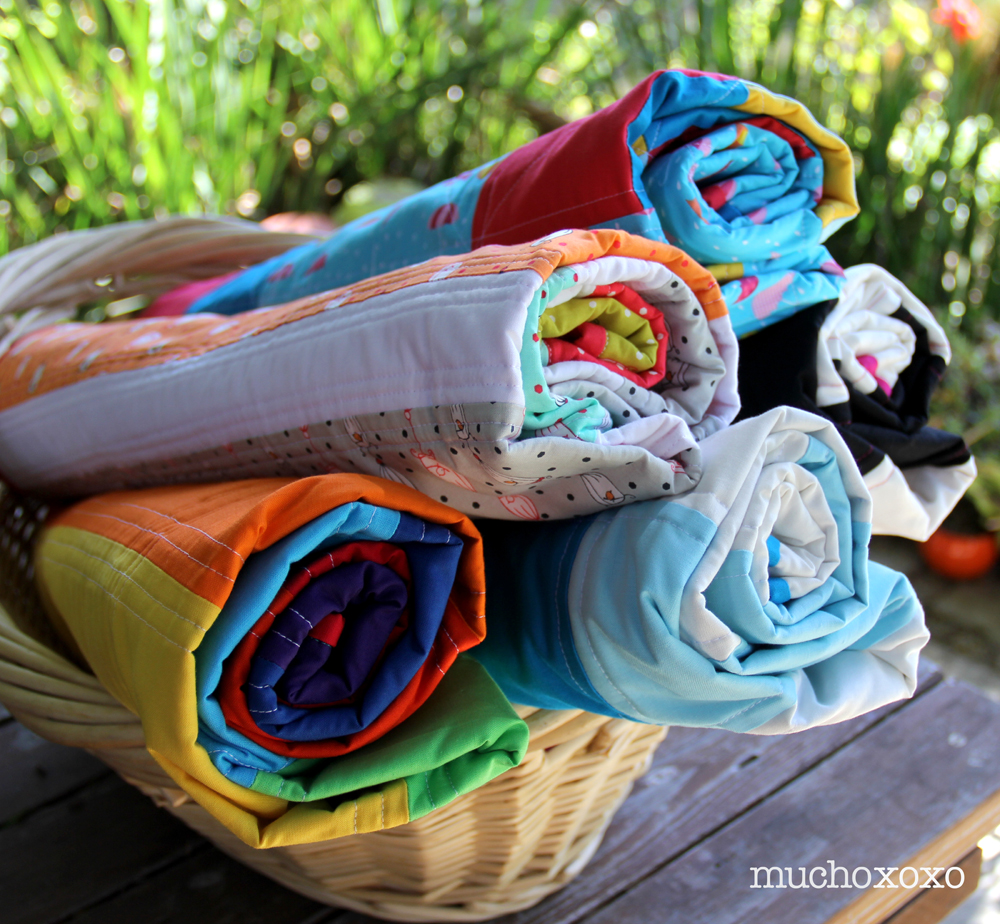
I managed to finish 5 quilts to contribute, and I’m SO happy with all of them.

quilt #1: strips & stripes

100 quilts for kids

For my first quilt, I went with a simple strip pattern. I love how it shows off this adorable fabric (Folk Tale Bird Cages by Natalie Lymer). The colors are so bright and refreshing, and the sweet little birds just make me smile!

100 quilts for kids

I did double rows of stitching instead of just one, and I love it! I especially love the little something extra it gives to the solid coral back. This is a great pattern for beginning quilters, or anyone looking for a quick and fun weekend project. It’s also perfect for showcasing prints that you just can’t bring yourself to cut up too much.

100 quilts for kids

The finished size is about 42″ x 42″. This quilt is going to Project Linus.


quilt #2: gingham checks

100 quilts for kids

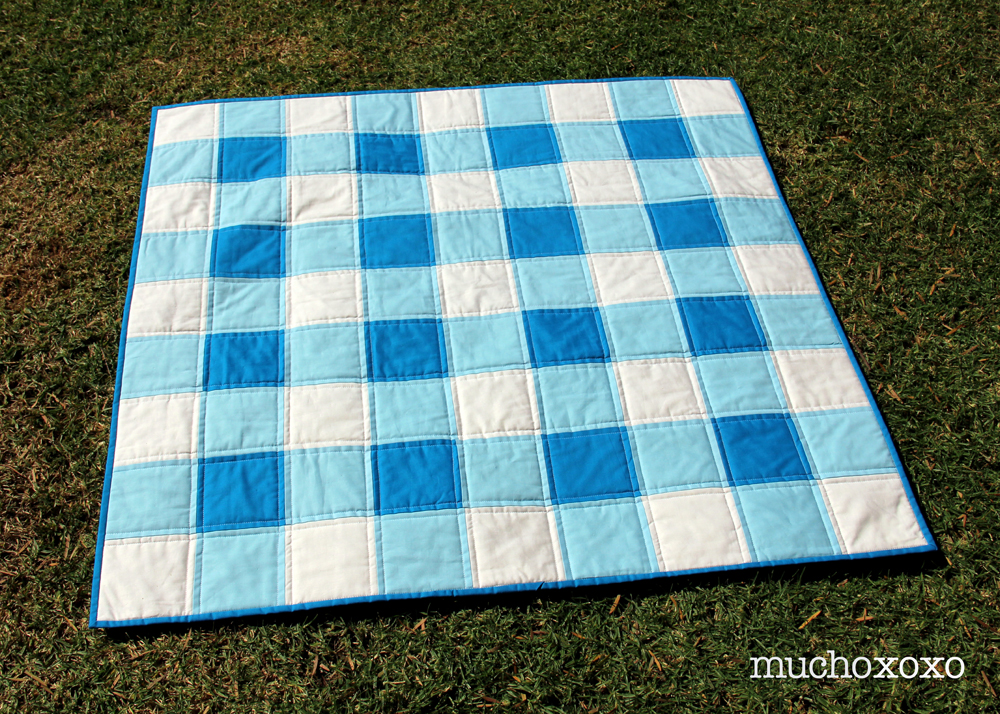
My next contribution is this fun gingham check quilt. I’ve been wanting to make one of these for a while. I have a pretty big stash of solids, so this was a great way to bust through some of them! I used Kona solids in White, Robin Egg and Lagoon for the front and binding. I knew I wanted to offset the solid front with a printed back, but I didn’t really have anything in my stash that felt right. Luckily, I found a cute print at Jo-Ann Fabric during a crazy clearance-on-top-of-clearance sale. Who doesn’t love monkeys, dogs and frogs!

100 quilts for kids

I did a single row of stitching on both sides of each seam. Clean and simple.

100 quilts for kids

The finished size is about 40” x 40”. This quilt is going to My Stuff Bags.


quilt #3: rainbow stripes

100 quilts for kids

I couldn’t resist sewing up a fun rainbow stripe quilt. The front is all Kona solids from my stash, and I picked up a playful alphabet fabric for the backing. It wasn’t quite wide enough so I added a bright strip of blue. I’m a big fan of breaking up backs this way. It’s easy and adds a nice graphic punch to it.

100 quilts for kids

I used the blue, as well as a little pop of red, for the binding. I did double rows of stitching along each seam, as well as along the blue strip on the back.

100 quilts for kids

The finished size is about 43” x 47”. This quilt is headed to a local NICU.


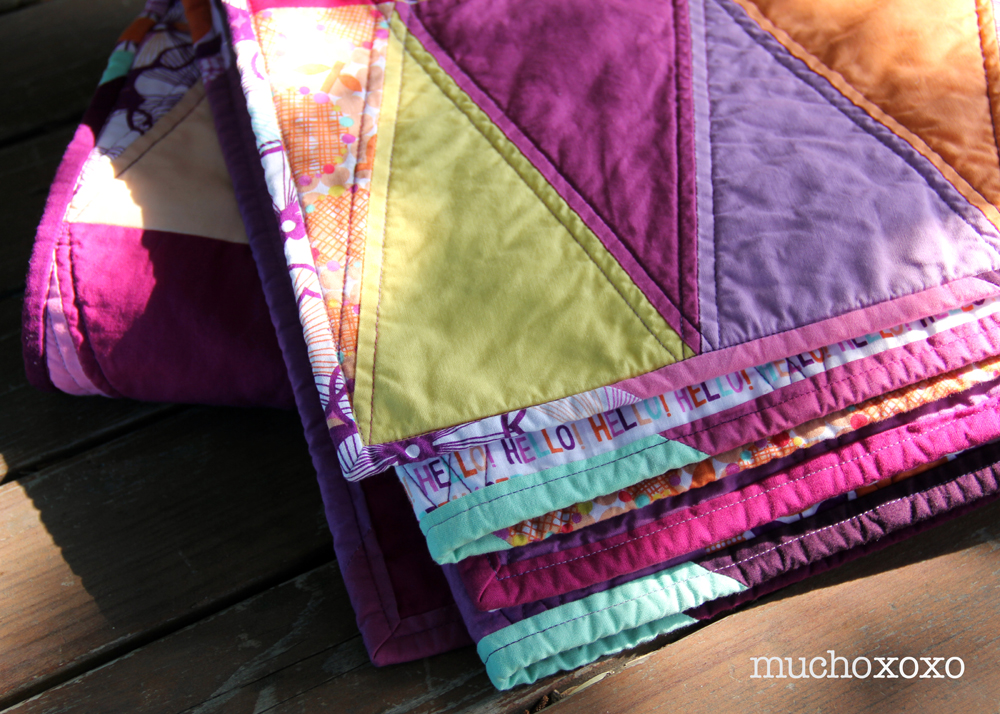
quilt #4: april showers color block

100 quilts for kids

My next contribution is this cheerful color block pattern featuring a fun print and bold solids. I picked up this print for about $2 a yard (woo!), and originally was thinking I would just use it as a backing fabric. But the more I looked at it, the more I wanted to incorporate it into the front. Maybe it’s because I’ve been desperately hoping for rain (Los Angeles has been hot hot hot), or maybe it’s because it’s just so adorable!

100 quilts for kids

I used this quilt pattern for a baby quilt I’m working on, and I love it! It’s fun and versatile, and works equally well with prints and solids. I did straight stitching as well as diagonal. I love the combination of the two. And of course, I had to do scrappy binding.

100 quilts for kids

The finished size is about 42.5” x 42.5”. This quilt is going to My Stuff Bags.


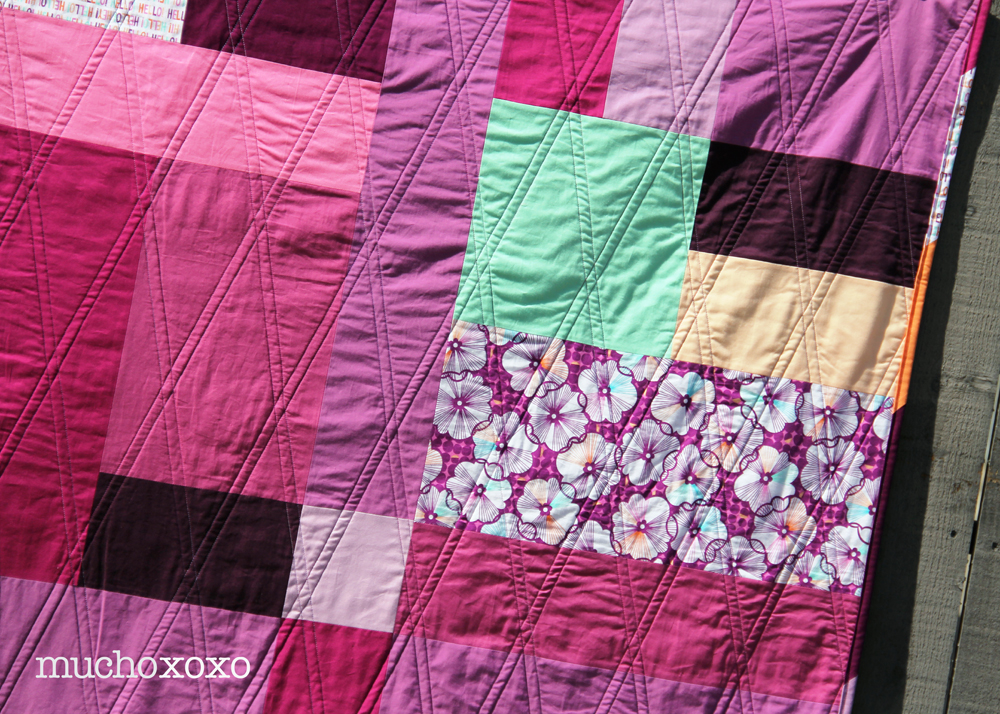
quilt #5: pop checkerboard

100 quilts for kids

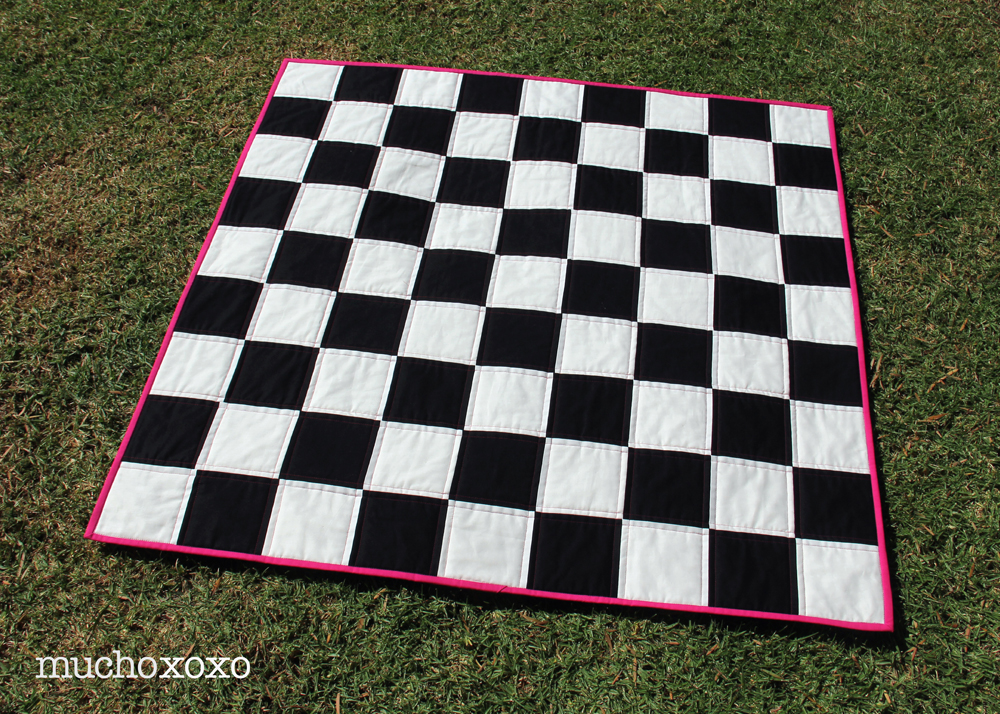
My final quilt for 100 Quilts for Kids is this fun checkerboard. Simple and graphic, with a pop of hot pink. I used a fun polka dot fabric for the backing, and a coordinating pink for the binding.

100 quilts for kids

I also decided to quilt with hot pink thread just to add a little extra pop.

100 quilts for kids

The finished size is about 40” x 40”. This quilt is going to Project Linus.


I had such a lovely time making all of these quilts. It was definitely a push to get them done, but it was well worth it! I hope the recipients loves them as much as I do :)

100 quilts for kids

If you haven’t already, I’d encourage you to hop on over to Quilts in the Queue and take a look at what everyone else made. There are some fantastic contributions, and I’m sure they will bring smiles and comfort to some very deserving children.

100quilts4kids

Have a great week!

xoxo


100 quilts for kids: progress!

The deadline for 100 Quilts for Kids is right around the corner, so I thought I’d share a quick peek of where I’m at!

100 quilts for kids

What the huh??? OK, I might be having a little too much fun. Or, I’ve gone completely insane. Possibly some wonderful combination of the two… I originally planned on making one, maybe two quilts. But as you can see, those numbers have grown. I couldn’t help myself!

To recap, 100 Quilts for Kids is an annual charity quilt drive that encourages quilters to make and donate a quilt to a child in need. This year it’s being hosted by Quilts in the Queue and it runs from August 1st – September 30th (only a few days away, don’t remind me!).

I’ve been wanting to make some quilts for charity for quite a while, so this was the perfect opportunity.

I gave myself a few guidelines:

  1. use as much fabric from my stash as possible.
  2. pick prints/colors and quilt patterns that just make me happy.
  3. finish one quilt before moving on to another. (obviously, I failed miserably at this one).

Anyway, time to get back to it. Wish me luck! Stay tuned for pics of the finished quilts and info on the charities they’re going to.

And hey, if you’re a fast quilter, there are still a few days to get in on the fun! Info and guidelines can be found here.

100quilts4kids

Have a lovely weekend!

xoxo

orange peel quilt-a-long

Well, I had so much fun with the last QAL that I’m jumping in on another! This one is for the orange peel quilt-a-long, hosted by Julie of button-button.

orange peel qal

In keeping with pushing myself to try new things, this project definitely fits the bill. The technique we will be using to make the orange peels is all hand-stitched appliqué. I’m a little afraid of anything involving hand stitching so this will be a challenge. But I’m looking forward to learning something new!

If you’ve been tempted to join in on a quilt-a-long but have been worried about feeling rushed, this might just be the perfect one for you! The plan is to go at a nice easy pace. You can also pick your project size based on how much time you think you’ll have. Better yet, you don’t really even have to decide on a finished size to get started, since you make one block at a time. I’m planning on doing a lap-sized quilt, but this would be fantastic as a mini or even a cushion.

Head over to button-button for all the details. Julie has also posted about materials and fabric choices here to get everyone started. I’m still a little stumped about fabrics, but reading her post definitely gave me some ideas.

I’ll be sharing my progress along the way, here as well as on instagram, so stay tuned for more!

Have a fantastic weekend :)

xoxo

quilting for a cause: 100 quilts for kids

100quilts4kids100 Quilts for Kids is an annual charity quilt drive that encourages quilters to make and donate a quilt to a child in need. This year it’s being hosted by Quilts in the Queue and it runs from August 1st – September 30th. There’s still plenty of time to get involved in this quilt-a-long for a great cause. Last year nearly 200 quilts were donated, and they’re hoping to surpass that this year.

If you’ve ever thought about making a quilt for charity, here’s your chance!

All the info you need to get started can be found here.

xoxo

sea breeze mini QAL: the big reveal!

You guys! It’s the big reveal day for the Sea Breeze Mini Quilt-A-Long! And my quilt is actually done! Woo! I had such a blast making this, can you tell?

sea breeze mini qal

I’m so happy with how the top turned out. The more I look at it, the more I love it! Such fun, vibrant colors. It just makes me smile.

I decided to keep the back simple and let the quilting be the main attraction. I used an awesome neon yellow thread from Coats & Clark. It’s intense, but I couldn’t resist!

sea breeze mini qal

I struggled a little with how exactly to quilt this. I knew I wanted to try something different and I’m pretty satisfied with how it turned out. And by the time I was done, I was much more comfortable burying my threads (bonus!). It just took a little getting used to :)

sea breeze mini qal

In keeping with the bold graphic look, I pulled a fun black and white print from my stash. Go big or go home, right?

sea breeze mini qal

So that’s it! I hope you love it as much as I do.

sea breeze mini qal

I’ve had such a great time being part of this quilt-a-long, I’m a little sad to see it come to an end! I’m completely blown away by all the fantastic translations of the Sea Breeze Mini Quilt pattern. What an inspiring group of quilters!

Thanks again to Angie for being such a fantastic host. Be sure to head over to Gnome Angel to see all the finished pieces. And you can vote for your favorite while you’re there! Voting is open 5 August 9:00am AEST – 7 August 5:00pm AEST (or for my friends in the States, August 4th at 4pm PDT – August 7th at 12am PDT… did I do that right?).

SeaBreezeMQAL

Have a good one!

xoxo

sea breeze mini QAL: meet my mini!

Hello all! Welcome to the halfway point of the Sea Breeze Mini Quilt-A-Long! Have you been keeping up with all the amazing contributors so far? It’s been quite a week! A big BIG thank you to Angie for being such a phenomenal host (and her incredibly kind words in my introduction on her blog!)  :)

This is my first QAL, and I have to say that I was a little nervous about joining in with such a talented group of quilters. But if I’ve learned anything, it’s that the quilting community is incredibly supportive and welcoming! And so with that, I was ready to jump in!

As usual, I gave myself some parameters to work with…

  1. I have to use fabrics from my stash.
  2. follow the pattern.
  3. break the pattern.

First, it was time to pick fabrics. Originally I was leaning towards prints, but ended up going for solids. What can I say? Old habits die hard! I decided on these awesome neon solids from Riley Blake. Aren’t they so fun?

Sea Breeze Mini QAL

Once I had my main fabrics picked, it was time to start playing with possible color arrangements. I planned on adding black or white for my background color but kept it open as I started to try things…  I made a quick mock-up in Adobe Illustrator and got to coloring! My only rule was I had to leave the block placement as it was in the original pattern. I went through quite a few ideas. Some kept closer to the original look, others went pretty far out there… I almost always try layouts out in Illustrator first, unless I’m doing improv. Just to give you an idea, here are some of the options I came up with.

Sea Breeze Mini QAL

It was fun exploring all the different ways you can break up the pattern. As usual, I used my family and friends as a mini focus group. And as usual, they all had a different favorite. I took cues from the ones they liked and came up with this layout. I love how the black and white balance out the neons, and it still really highlights the pattern. It’s simple and graphic, right up my alley!

Sea Breeze Mini QAL

This was my first time with half square triangles (HSTs), and I can see why they’re so popular. They’re incredibly versatile, and it’s a great way to get a number of blocks done quickly. If you haven’t tried them, you should give it a shot! This pattern has you make them in the traditional method, but there are a number of tutorials on how to create as many as 8 or even 18 HSTs at a time!

Sea Breeze Mini QAL

I chain pieced all of my HSTs, fast and easy. Then it was time to iron and trim. It’s been so hot in Los Angeles, I was grateful that I only had a mini’s worth of pieces to press!

Sea Breeze Mini QAL

I used my standard square ruler to trim the HSTs. It worked fairly well, but I can definitely see the appeal of the bloc loc. If you’re new to HSTs and a little worried about squaring them up, a helpful trick is to make your starting squares slightly larger than is called for. This will give you a little more wiggle room to get your seams perfectly lined up on the diagonal when you trim.

Sea Breeze Mini QAL

Such happy little scraps!

Sewing the quilt top was fairly quick. I had a few issues with things lining up, and I did have to rip out a few seams and try again. They’re not all perfect but I’m happy with the final result.

Sea Breeze Mini QAL

So here it is, my finished quilt top… Now I just have to quilt and bind this little bugger! Hmmm, what to do, what to do!

I’ll be sharing my finished quilt on August 2nd. Keep an eye on Instagram for some sneaky peeks until then. Be sure to hop over to Gnome Angel to learn more about all of the participants and see their fantastic takes on this great little quilt. There’s also still plenty of time to get in on the fun and make your own Sea Breeze Mini! Angie’s site has all the info you need to get started. The incredibly talented Ms Midge is hosting a progress link party here, go check it out! And if you’re participating, be sure to link up your progress so everyone can see what you’ve been up to :)

SeaBreezeMQAL


Have a fantastic weekend!

xoxo

sea breeze mini quilt-a-long

I’m super excited to be part of the upcoming Sea Breeze Mini Quilt-A-Long, hosted by the lovely and talented Angie of Gnome Angel!SeaBreezeMQAL This will be my first quilt-a-long (aka QAL) and I’m looking forward to seeing what everyone does! Angie has put together a great group of bloggers and instagrammers to share their process, as well as tips and motivation over the two week period (7/21 to 8/2). I’ll be posting my progress on July 26th and revealing my finished mini on August 2nd. I can’t wait!

There’s still plenty of time to get in on the fun! The pattern is from Canoe Ridge Creations, available here. And you can read more about the quilt-a-long here. Angie has started a Facebook group for participants and will be posting a link party where you can link to your final quilt on either your blog or via Instagram. (Not sure what a link party is? Read about them here.)

Keep an eye on Angie’s blog in the coming weeks for more info. I’ll be sharing sneak peeks of my quilt via Instagram, and you can search #seabreezemqal to see what everyone is up to. So come and join us! Whether you make your own or just follow along, it’s sure to be a good time!

xoxo

improv mini quilt: radiant gem

Ok, I just missed getting this into the Blogger’s Quilt Festival going on (bah!), but I’m so smitten that I couldn’t wait to share it… Say hello to Radiant Gem! (I’m also calling it my happy accident quilt). This is my first attempt at improv quilting, and I think I’m hooked!

radiant gem quilt front

Remember the quilt I made for the Radiant Orchid Quilt Challenge? Feels like so long ago that I finished it! Not only was I left with a comfy quilt that makes me happy every time I look at it, I was left with a sizable pile of pretty little scraps.

radiant gem quilt scraps

Those scraps sat for some time, staring at me… Then one day I finally said enough and decided to throw them out. But as I started sifting through all the beautiful orchid hues, I couldn’t bring myself to do it. So I sat down at my machine, and set the disorganized pile of scraps next to me. And I just started sewing. No plan. No vision for the end result. I just sewed… Pick up a piece. Sew. Add another. Just keep going. (With lots of ironing along the way, lots). At some point, I stopped, set the improv “what-the-heck-is-this-thing” on the floor and stepped back. I walked around it, and wouldn’t you know it, a little gem had begun to take shape!

radiant gem quilt detail

I added a few more pieces where they were needed to emphasize the gem, and then I just grabbed all of the scraps of the same color and started sewing until the size felt right. It looked a bit plain so I added a few additional colors to the corners. So glad I did, I really love this little detail.

radiant gem quilt corner

I also decided to give matchstick quilting a try for the first time. It’s tedious but I love it. And the variegated thread is just perfect for this.

radiant gem quilt detail

I used a solid color for the back to really show off the quilting. And of course I had to do scrappy binding. The finished size is about 27×23 inches. Not sure what to do with it yet. Maybe a wall hanging?

radiant gem quilt binding

So that’s it. That’s how this little Radiant Gem came to be. I wish I had taken pictures along the way but I really didn’t think it would turn into anything worth keeping. Live and learn, right? ;)

radiant gem quilt detail

Have a great weekend!

xoxo

radiant orchid quilt: hello triangles!

Can it be? Is my Radiant Orchid quilt finally done?????

radiant orchid quilt front

radiant orchid quilt back

This has been quite a labor of love. And hate. And frustration. And a fair share of cursing. And, well you get it…

radiant orchid quilt When I decided to enter something into the Pantone Quilt Challenge, it was less about winning and more about trying something new. And boy did I!

This was a fairly big step out of my usual color palette, and I have to say it was a fun little trip! I originally thought I would use all solids, but as I started planning my quilt, my little stack of Moxie by Erin McMorris peeked out of my stash and said “hey Amanda, can we come out and play?” I just love the colors and playful prints (you might recognize a few from my bubble pocket skirt). It’s hard not to smile when you look at them. Which is a good thing, because we were about to spend A LOT of time together! I added a few more colors to compliment the prints and radiant orchid hues I had already picked. I also found some beautiful variegated thread to use for the quilting and binding. radiant orchid quilt materials When it came to deciding on a pattern, my only requirement was that I had to try something new. I finally narrowed it down to two options– a triangle quilt, or something more simple and modern. I went back and forth on this and finally decided, why not do both! radiant orchid quilt I’ve never made a triangle quilt and I was looking forward to giving it a shot. I used a dear jane template to cut the 231 triangles, and it actually went surprisingly fast. Assembling the triangles was a different story. It was definitely a struggle in the beginning… Why won’t my pieces work? What am I doing wrong? Why can’t I figure this out? Maybe I should just give up!… Yep, it was a bit of a roller coaster for a while. If you’ve made one, you probably know what I’m talking about. I learned a few things along the way, but that’s a post for another time.

radiant orchid quilt

It took a while, but once I got the hang of it, things went smoothly. And with every successful intersection, I celebrated a small victory! radiant orchid quilt By comparison, the back came together pretty quickly. I love the contrast between the more traditional front and the modern asymmetrical back. I chose to quilt only the diagonals, and I love how the diamond pattern looks on the back. And the variegated thread is beautiful! radiant orchid quilt I also decided to try scrappy binding for the first time. Originally I was going to piece the strips randomly but I decided I wanted to be a little more deliberate with the placement (OCD much?). I really didn’t make things easy on myself. I absolutely spent too much time on this. I love how it looks but next time I think I’ll go for random. radiant orchid quilt binding Looks good enough to eat, doesn’t it? And I even had a label that matched the Radiant Orchid perfectly! radiant orchid quilt label Binding the quilt used to be my least favorite part, but with every quilt I gain a little more confidence. If you’re still struggling with your binding technique, here’s a quick video tutorial that I find very helpful. radiant orchid quilt This project has been quite an experience. It tested my patience. It tested my skills. It even gave me nightmares. Seriously. But in the end I’m very happy with how it turned out.

radiant orchid quilt

Quilt details:

  • Finished size- approx. 77 x 54 inches
  • Quilt design by me
  • Fabric- moxie print and an assortment of cotton solids (kona cotton, hawthorne hues and alissa haight carlton)

If you’re curious what other people have done for the challenge, you can visit the 2014 pantone quilt challenge: radiant orchid flickr group or take a look at the entries at either of the links below. There’s some really nice work!

Linking up with on the windy side and play crafts 2014 pantone quilt challenge Ok, time to curl up with my new blanket!

xoxo

2014 pantone quilt challenge – let’s go!

I don’t know about you, but I’m a bit obsessed with all things Pantone. Coming from a design and art direction background, it’s become part of my daily life. So it should come as no surprise that I’m always excited to find out what Pantone’s color of the year is going to be. Does that make me a bit of a color geek? Totally. But it’s a badge I wear with pride!

This year, the winning color is Radiant Orchid

Pantone Radiant Orchid

When I found out about the Pantone Quilt Challenge, it seemed like a fun way to celebrate the color of the year, and challenge myself to try something new. I’ve never entered a quilting challenge… Rules? And a timeline??? Ohhh boy, this could get interesting!

2014 pantone quilt challenge

The challenge is being hosted by Adrianne from On the Windy Side and Anne from Play Crafts. If you’re unfamiliar with their blogs, do yourself a favor and go check them out!

Radiant Orchid is a little out of my color-comfort-zone, so I’m looking forward to pushing myself. I ordered a fabric swatch to take with me on my hunt for coordinating fabrics. I got mine on Amazon but they’re also available through the Pantone site. I haven’t decided on a pattern yet, but I’ve already told myself it has to be something I haven’t done before.

Radiant Orchid Swatch

If you’re a quilting color geek like me, get in on the fun and enter! (Follow either of the blog links above for more info). And if quilting isn’t your thing, why not use Radiant Orchid as inspiration for a fun project of your own! I have a feeling this color will be popping up in a few things I have planned. But first thing’s first, it’s time to get going on this quilt!

xoxo