2015 finish-along: Q1 goals

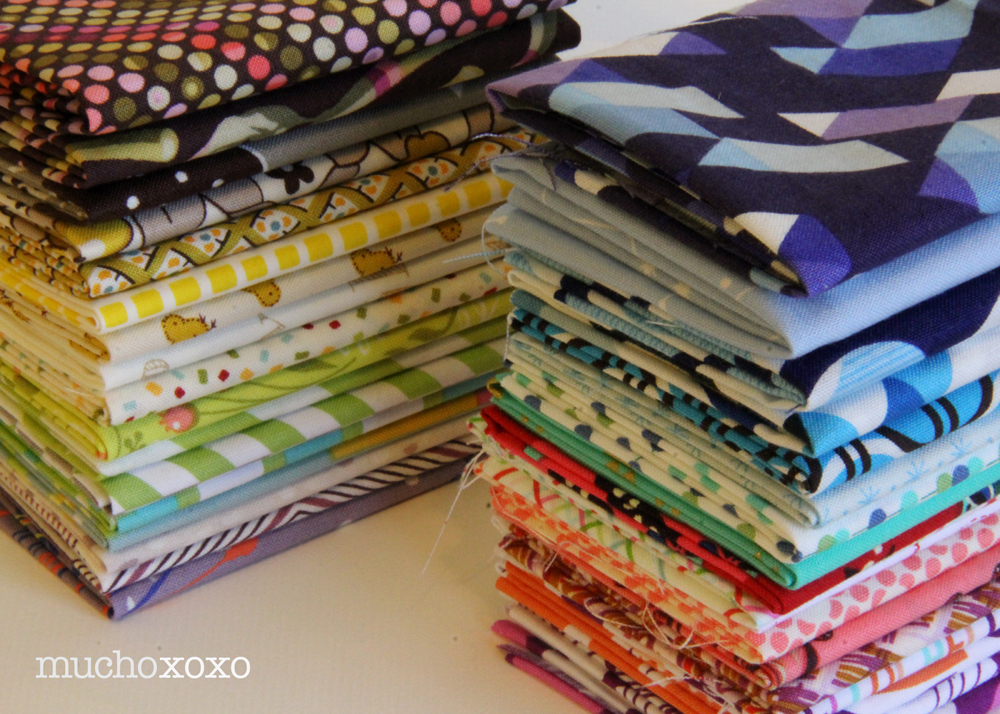
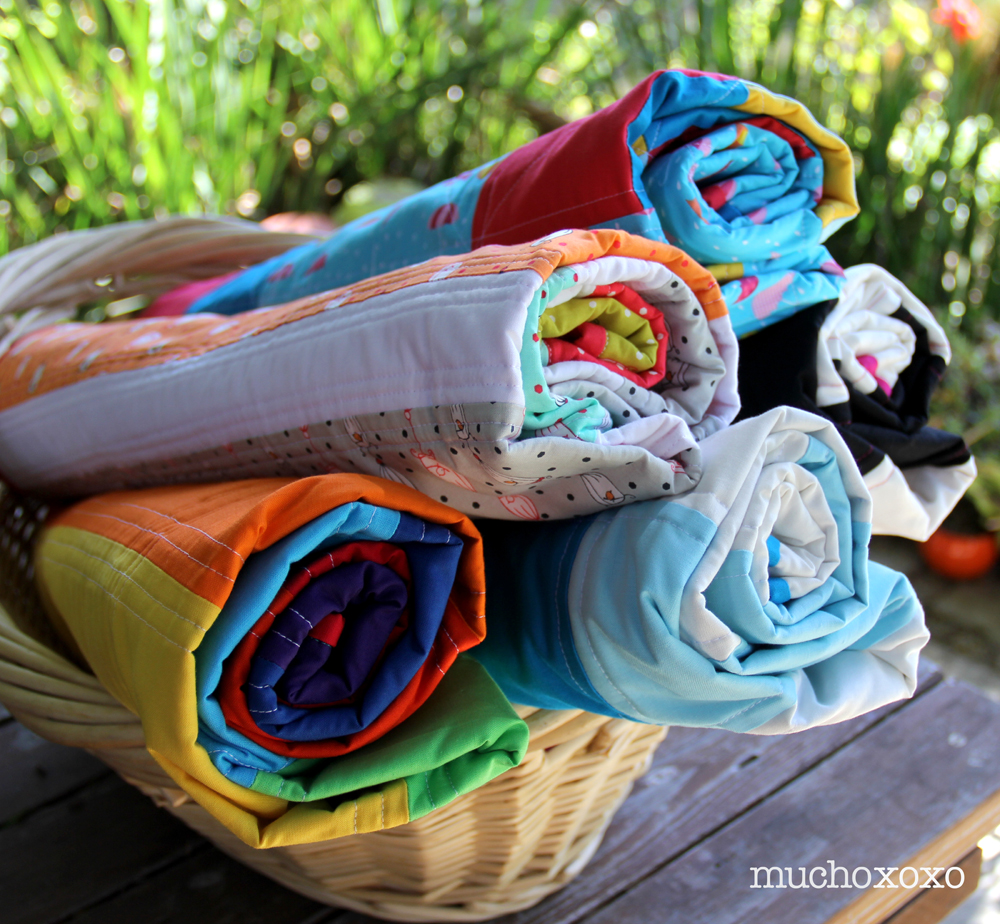
I don’t know about you, but I’m constantly thinking of things I want to make. And I love starting new projects. But finishing them? That’s a different story… My little pile of WIPs and UFOs has gone from manageable to almost comical. (They sure are pretty though, aren’t they?)

muchoxoxo 2015 finish-along Q1

So… I’m adding a new rule to my list– No starting a new project until I finish an old one. Should be easy enough, right? Right???

That’s why I’m excited to be joining in on the 2015 Finish-Along, hosted by the fabulous Adrianne of On the Windy Side. I could definitely use a little push to get my WIPs done and clear my mind (and sewing table) for new projects!

2015FALbutton200

OK, deep breath… Here’s my list of proposed Q1 finishes:

  1. high tea quilt – top is finished, need to make backing, quilt & bind.
  2. orange peel quilt – peels done, need to finalize layout, quilt, etc.
  3. washi bag – pattern cut, fabric picked, just need hardware.
  4. secret quit #1 – top is finished, need to make backing, quilt & bind.
  5. secret quilt #2 – need to finish top, make backing, quilt & bind.
  6. secret quilt #3 – pieces cut, have a vision, now just to make it.
  7. secret quilt #4 – have fabric and pattern, just need to cut and go!
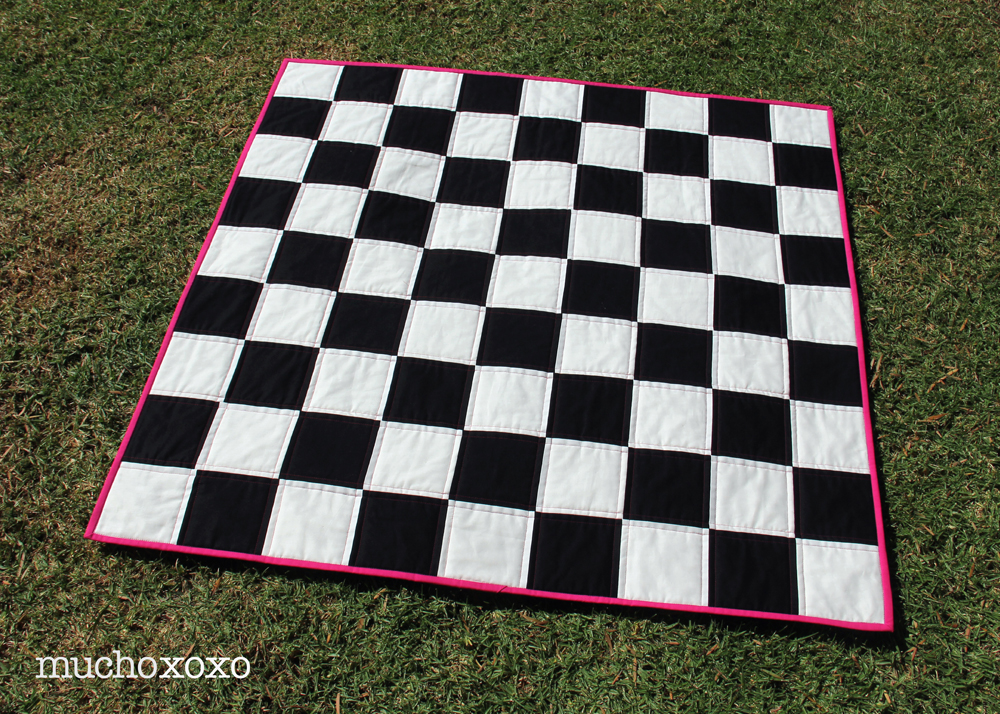
  8. charity quilt – top is finished, need to make backing, quit & bind.
  9. secret baby gift #1– fabric cut, need to assemble.
  10. secret baby gift #2 – pieces mostly cut, need to assemble.
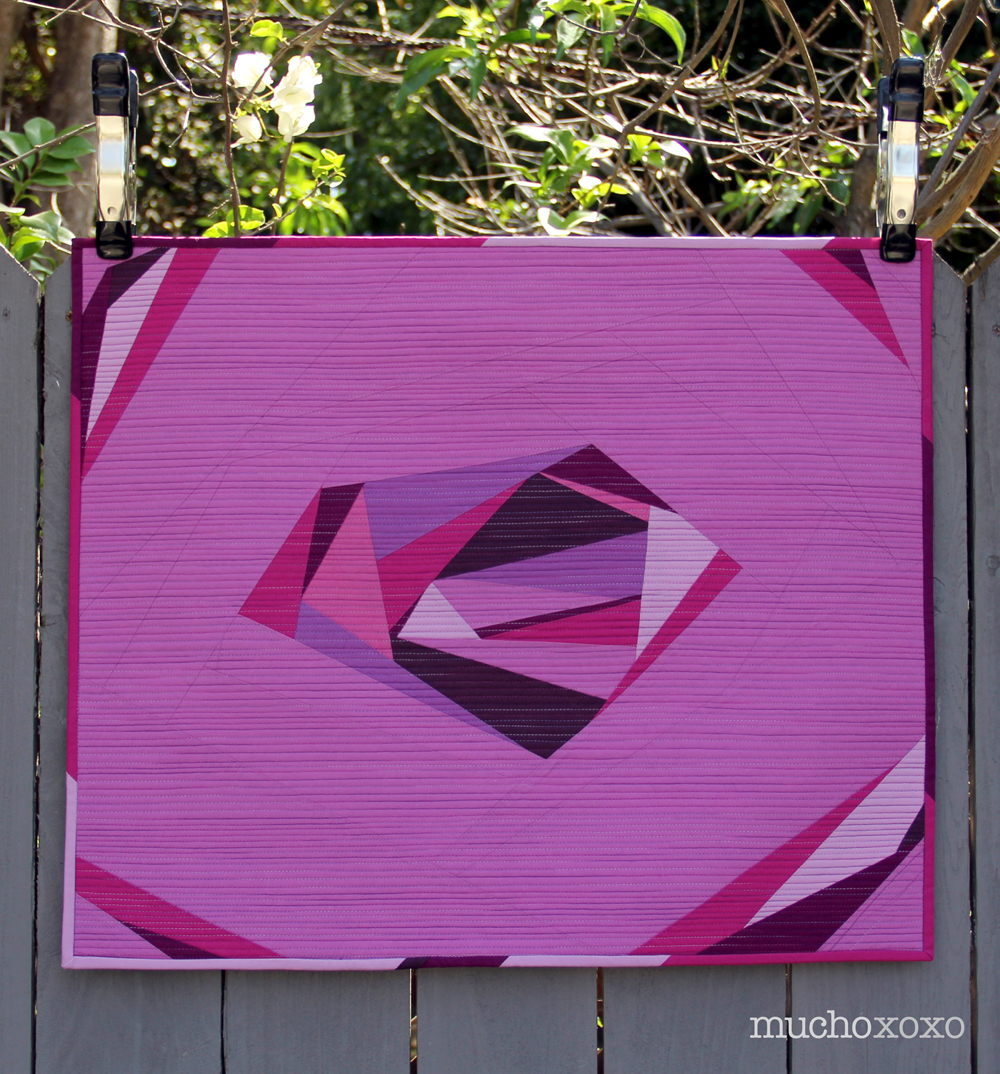
  11. cotton + steel quilt for me! – have fabric & pattern, time to sew :)
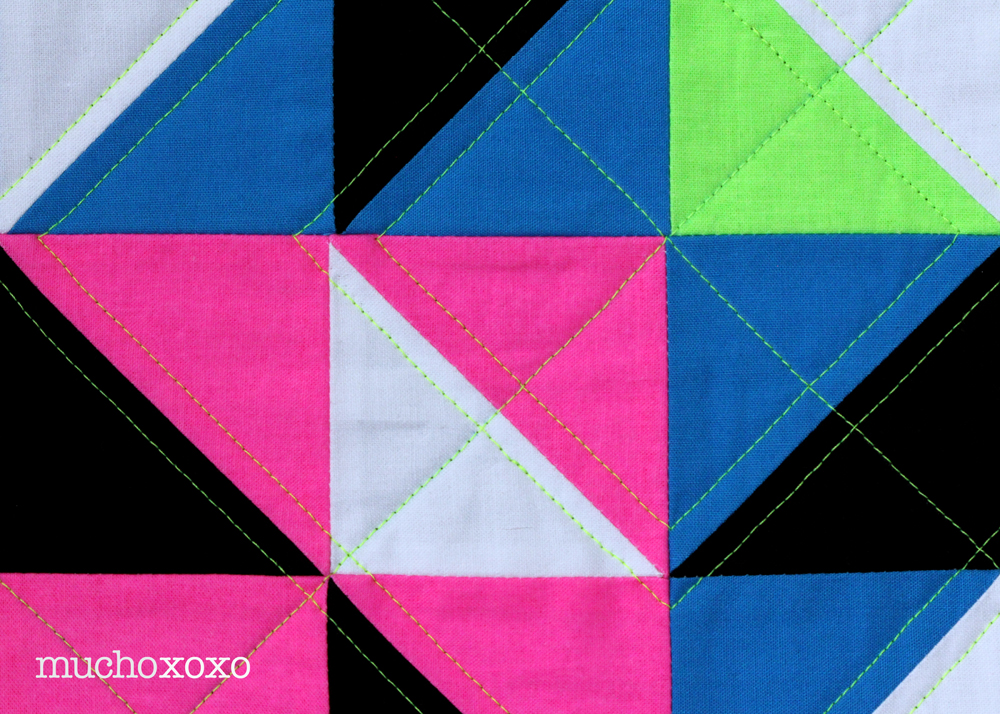
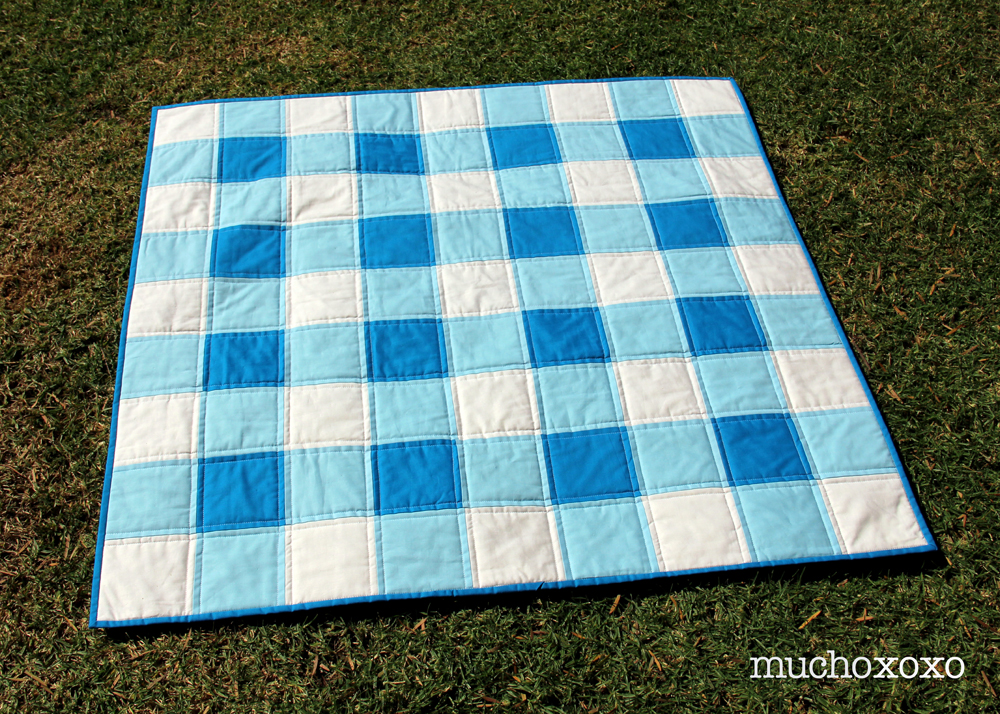
  12. improv quilt– top almost done(?), need to make backing, quilt & bind.
  13. super tote – pattern cut, fabric picked & prepped, time to make it!
  14. zippy top for me! – have pattern and fabric, just need a zipper.

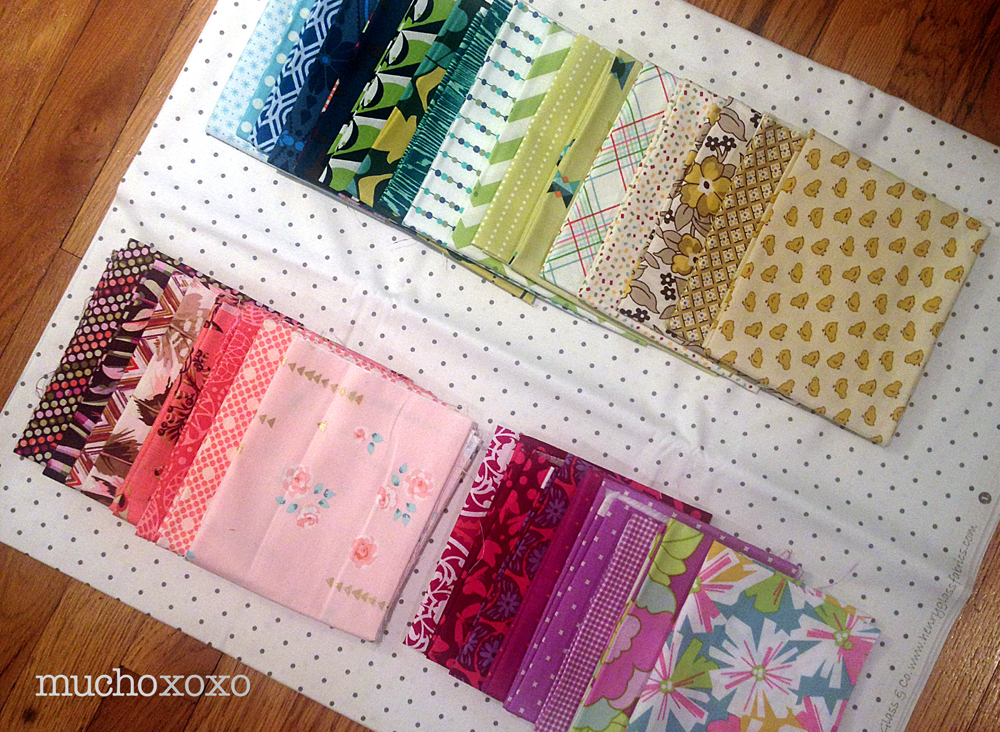
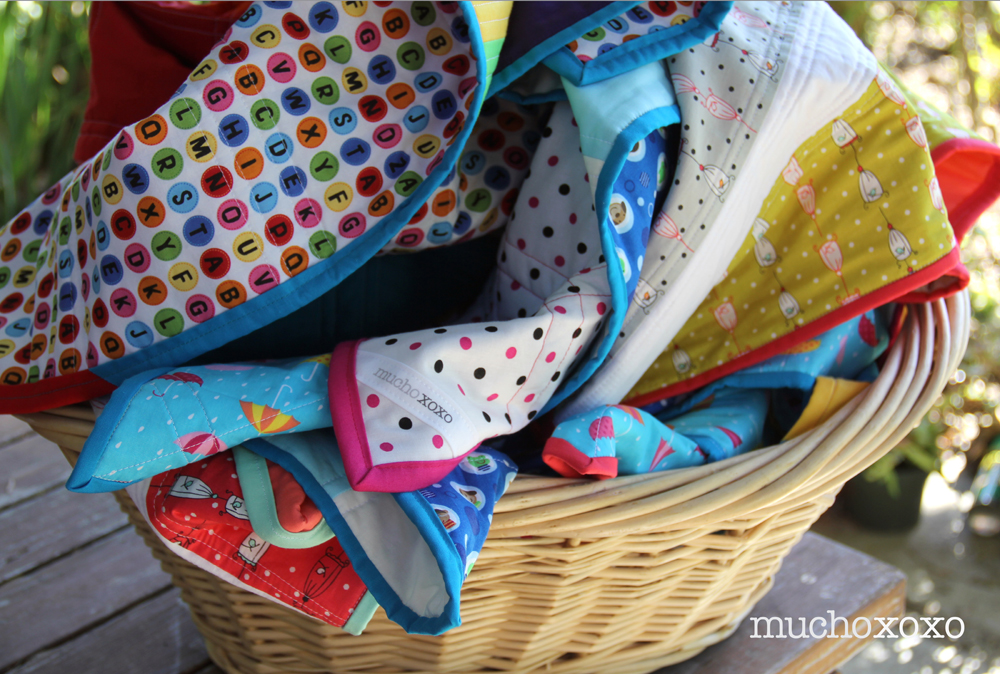
As you can see, there’s a lot of top secret sewing happening these days, hence the lack of specifics. Although I did leave a few clues in the picture… So many gifts, so little time! I also made sure to include some personal projects, and I’m going to do my best not to demote them to last priority.

Do you have a pile of half-finished projects that are just begging to be completed? Why not join in! More info on the finish-along and how to get involved can be found here.

I’ll be sharing my projects as I finish them. And in the meantime, hop on over to On the Windy Side to check out everyone’s proposed finishes. You can also follow along on Instagram by searching #fal2015.

have a great week!

xoxo

giveaway day winner, and a surprise!

mucho xoxo giveaway day prizes

A big thank you to everyone who came by and participated in my giveaway. I enjoyed reading everyone’s comments! So many fun ideas, I think I may have added a few new projects to my holiday to-do list :)


Congratulations to BRANDI S. for being the lucky winner!!!


And because I had such a great time this week, I decided to select two additional winners who will each receive a little surprise from me as well! Congratulations to JORDAN L. and SANDI T.! I will be emailing all of the winners momentarily, so keep an eye on your inboxes.

Thanks again to Sew Mama Sew for hosting this week of fun. I hope you all had a good time, and found some new sources of inspiration. I know I did!

Have a great weekend :)

xoxo

*all winners selected using true random number generator powered by random.org

hooray! it’s giveaway day!!!

Another Sew Mama Sew Giveaway Day is upon us, and I’ve had so much fun entering in the past that this time around I decided to spread the love and get in on the giving!

giveawaydaydec8

If this is your first time here, welcome! Please do take a look around and enjoy. Here’s a small sampling of some of my favorite projects.

mucho xoxo projects

1. color-pop quilted stockings 2. boho baby outfit 3. radiant gem improv quilt 4. neon sea breeze mini quilt 5. toddler backpack 6. bunny geranium dress

Beyond having the chance to win all sorts of fun prizes (everything from handmade gifts to sewing supplies), Giveaway Day is a great way to discover new sources of inspiration and support this fantastic online community. In fact, Giveaway Day has become so popular that it now lasts all week!

OK, enough chit-chat, let’s get to the prize! I’ve put together a little package of goodness that I hope one winner will love as much as I do.

mucho xoxo giveaway day prize

The prize includes:

  • A yummy bundle of 30+ fabric cuts (each approx. 11″ square) from my stash to help you build yours
  • Mini Hex N More ruler
  • A little extra surprise, because who doesn’t love surprises!

You can enter my giveaway below. Then make sure to head over to Sew Mama Sew and check out all the fantastic goodies up for grabs!

mucho xoxo giveaway day prize

**THIS GIVEAWAY IS NOW CLOSED**

To enter the giveaway:

  • Leave a comment on this post and answer the following question: What is your favorite handmade gift to give?
  • Earn a second entry by following me on Instagram (I’m @muchoxoxo). Be sure to come back and leave a separate comment that you follow (please leave your IG name as well).

*If you are a no-reply blogger (or if you’re not sure), please leave your email address in your comment so I can contact you if you win! 

*Open to US mailing addresses only. (Apologies to my international friends. But don’t fret, many of the other giveaways are open to international entries).

*Contest will remain open until Friday, December 12 at 5 p.m. PST. One winner will be chosen at random and notified via email by December 14. Please note that if I don’t hear back from the winner within 24 hours, I will randomly choose another winner.

Good luck, and thanks again for stopping by!

xoxo

giveawaydaydec8

**THIS GIVEAWAY IS NOW CLOSED**

orange peel quilt-a-long: appliqué

orange peel qal

It’s time for another Orange Peel Quilt-A-Long update! I’ve made a lot of progress since my last check-in, and have definitely found my groove with this project. Once I figured out my basting technique, finishing the rest of the peels was fairly easy. So with a big batch of peels basted and a nice stack of backing fabric good to go, I was ready to attempt my very first appliqué!

OrangePeelQAL_ready

Again, I struggled a little in the beginning. But I found my rhythm and a method that works for me, and I just kept going. I found that my peels sat flatter on my backing and were easier to hold while stitching if I used slightly bent pins. Not necessary by any means, this is just what worked for me.

OrangePeelQAL_pinned

I strayed a little from Julie’s appliqué instructions and did what I’m calling a modified ladder stitch. Traditional appliqué has you come straight up through the back and catch a few threads at the edge of your piece. I had a very hard time with this! I felt uncoordinated and sloppy. So instead, I came in at a slight angle, went out through the fold/corner, and straight down to the back.

Orange Peel QAL stitching

(I did a slightly exaggerated angle here so it was easier to see)

For me, this method was much easier. And the paranoid quilter in me feels like this will be more durable in the case of regular use and multiple washings.

Orange Peel QAL progress

So that’s where I’m at! I’m still not exactly sure what size this is going to end up. Right now I’m just making peels and enjoying the process… I’ll run out of backing fabric soon, and then I guess I’ll know I’m done! Then it will be time to choose my layout and trim blocks :)

Stay tuned for more Orange Peel QAL fun. And in the meantime, hop on over to button-button and take a look at everyone’s progress! You can also take a peek on Instagram by searching #orangepeelqal2014.

xoxo

orange peel quilt-a-long: fabric + prep

orange peel qal

Things definitely got off to a slow start with my orange peel quilt (too many projects going at once, maybe?) but I’ve made up for lost time and I’m back on track! Let’s start at the beginning, shall we?

The first task was pulling fabric. My only rule (as always) was that I had to pull from my stash. I knew I wanted to use color, and lots of it. So, I finally decided to go for scrappy/random peels in a range of colors on a neutral low-volume backing. Now, my stash has plenty of colors and bold prints, but neutral? I hardly have any! I did have a fun grey polka dot fabric that I’ve been wanting to use, so I decided to go with a uniform backing for the peels.

OrangePeelQAL fabric

This is my first fabric pull, and I’ve since continued to add to it from my stash.

In the spirit of catching up (and planning ahead for being without my sewing machine for a few days), I cut 30+ freezer paper peels so I could just go go go! I went ahead and started ironing them to the fabrics I pulled. I decided to only do one peel per print, no repeats.

OrangePeelQAL ironed

Then it was time to baste. I tried one… And, wow! It was a complete disaster! It was SO bad… This was my first time working with freezer paper, and I clearly didn’t iron it long enough. So before I was even half way through basting, the freezer paper started to release from the fabric and slide around. It makes it almost impossible to get a good grip on the fabric. No bueno.

(This is where the picture of my failed basting attempt would go, but it was so epically bad that I immediately threw it away. Yes, it was really that bad.)

Honestly, it was a little discouraging. But I was determined to keep going. Don’t let one bad peel ruin the whole bunch, right? I re-ironed all the peels to make sure the freezer paper had a nice strong hold. And I was ready to give it another go. It took a few peels to figure out a method that worked for me, but once I did they went pretty fast. Phew!

OrangePeelQAL basted

One thing I did in addition to Julie’s basting instructions that I found very helpful was to quickly finger-press the peels before sewing.

OrangePeelQAL fingerpress

It creates a nice crisp fold and made the sewing go much quicker for me.

Orange Peel QAL detail

Next up, appliqué! More on that very soon, so stay tuned. In the meantime, hop on over to button-button and take a look at everyone’s progress. You can also take a peek on Instagram by searching #orangepeelqal2014.

Have a great week!

xoxo

blogger’s quilt festival: neon sea breeze

Welcome, friends! My second entry into the Fall 2014 Blogger’s Quilt Festival (small quilts category) is my Neon Sea Breeze!

sea breeze mini qal

I made this quilt for my first ever QAL and blog hop, hosted by the awesome and awesome (yes I meant to say it twice) Angie of Gnome Angel.

The pattern we used is the Sea Breeze Mini from Canoe Ridge Creations. I chose a combination of lively neons and black & white to play with contrast and really highlight the lovely and versatile design.

sea breeze mini qal

I decided to keep the back simple and let the quilting be the main attraction. I used a neon yellow thread from Coats & Clark. It’s intense, but I couldn’t resist!

sea breeze mini qal

In keeping with the bold graphic look, I used a fun black and white print to bind the quilt.

sea breeze mini qal

It’s not always easy to put yourself out there, but I’m so glad I did! And because of that, this bright and happy quilt holds a very special place in my heart. Not only does it scream “Amanda,” it also introduced me to a whole new world of quilty friends. Really, such a welcoming and supportive group of people!

sea breeze mini qal

quilt details:

  • name – neon sea breeze
  • finished size – 22 ½” x 22 ½”
  • pattern – sea breeze mini by canoe ridge creations
  • fabric – neon solids from riley blake, kona solids in black and white, black & white fretwork from camelot design studio
  • pieced and quilted by me

Don’t forget to head over to the Blogger’s Quilt Festival to check out all the amazing entries. Seriously. Do it now. I promise, you won’t be disappointed :)

You can vote for my quilt in the small quilts category here from Nov 1 to Nov 7. I’ve also entered my Radiant Gem in the modern quilts category, check it out here!

Fall-2014-BQF-Button

A very big thank you to Amy for organizing the event. It’s quite an undertaking, and she has done a fantastic job, as always!

have a great weekend!

xoxo

blogger’s quilt festival: radiant gem

The Blogger’s Quilt Festival, hosted by Amy’s Creative Side, is going on now, and instead of sitting on the sidelines this time, I’m jumping in and entering!

Fall-2014-BQF-Button

First up in the modern quilts category, my Radiant Gem improv quilt. Apologies to those who have seen it, bear with me as I get out all the details. And to all the newcomers, welcome!

radiant gem quilt front

This quilt was made entirely with scraps from my Radiant Orchid Challenge quilt that were just too pretty not to do something with.

radiant gem quilt detail

I chose to matchstick quilt with a delicious variegated plum-purple thread from Coats & Clark. This was my first time matchstick quilting. It’s not a fast process, but well worth the effort.

radiant gem quilt detail

I used Kona Berry for the back to really show off the quilting, and I of course had to do scrappy binding.

radiant gem quilt binding

Of all of my quilts, I’m particularly fond of my little Radiant Gem. It was 100% improv, and I found the exercise very rewarding, and surprisingly relazing! It was the first time that I had absolutely no plan other than to just sit down and go (not always easy for me) and I just love how it turned out. Sometimes not having a plan is the best plan!

radiant gem quilt detail

Quilt details:

  • name – radiant gem
  • finished size- approx 27″ x 23″
  • fabric- assorted cotton solids (kona cotton, hawthorne hues and alissa haight carlton)
  • pieced and quilted by me

The Blogger’s Quilt Festival is always a wealth of drool-worthy quilts and inspiration. If you haven’t already, go to Amy’s Creative Side and take a look!

And, if you’re so inclined, you can vote for my quilt here from Nov 1 to Nov 7. I’ve also entered my Neon Sea Breeze in the small quilts category, check it out  here!

xoxo

pattern testing: high tea quilt

The lovely and talented Adrianne of On the Windy Side has just released her first self-published quilt pattern, called High Tea, and I was lucky enough to get to pattern test it before the release. Here’s my finished High Tea quilt top!

HighTeaQuilt_square_1

The High Tea quilt pattern is super versatile, and would work equally well with pre-cuts or as a scrappy stash-busting project. I chose to use high-contrast black and white prints, most of which came from my stash (a current requirement for all of my projects).

high tea quilt detail

The quilt top came together quickly and without too much trouble. (The only problem I had was 100% my own fault because I was paying more attention to Top Chef than my sewing). I absolutely love how it turned out, and I can’t wait to finish it!

Adrianne has written a fun and easy-to-follow pattern that quilters of all skill levels will love! The pattern has all the information needed to make the quilt in 5 different sizes, from baby to queen. (I made the cot size– 43” x 56”).

A number of talented quilters jumped in to help test the pattern, you can see all of their fantastic takes on it in Adrianne’s post here.

The High Tea quilt pattern is available now on Craftsy and Adrianne’s Etsy Shop. It will be available at a discounted price for a very limited time to celebrate the release, so pick it up now!

high tea quilt

I clearly had a terrible time taking pictures ;)

A big thank you and congratulations to Adrianne on her first pattern release. I have no doubt that it will be very well-received. And if you make one, be sure to share it on Instagram (tag #highteaquilt and #onthewindysidequilts) or in Adrianne’s Flickr group.

Have a fantastic week!

xoxo

100 quilts for kids 2014

100 Quilts for Kids wrapped up last week, and now that I’ve had a moment to breathe, it’s time to share!

100 quilts for kids

I managed to finish 5 quilts to contribute, and I’m SO happy with all of them.

quilt #1: strips & stripes

100 quilts for kids

For my first quilt, I went with a simple strip pattern. I love how it shows off this adorable fabric (Folk Tale Bird Cages by Natalie Lymer). The colors are so bright and refreshing, and the sweet little birds just make me smile!

100 quilts for kids

I did double rows of stitching instead of just one, and I love it! I especially love the little something extra it gives to the solid coral back. This is a great pattern for beginning quilters, or anyone looking for a quick and fun weekend project. It’s also perfect for showcasing prints that you just can’t bring yourself to cut up too much.

100 quilts for kids

The finished size is about 42″ x 42″. This quilt is going to Project Linus.


quilt #2: gingham checks

100 quilts for kids

My next contribution is this fun gingham check quilt. I’ve been wanting to make one of these for a while. I have a pretty big stash of solids, so this was a great way to bust through some of them! I used Kona solids in White, Robin Egg and Lagoon for the front and binding. I knew I wanted to offset the solid front with a printed back, but I didn’t really have anything in my stash that felt right. Luckily, I found a cute print at Jo-Ann Fabric during a crazy clearance-on-top-of-clearance sale. Who doesn’t love monkeys, dogs and frogs!

100 quilts for kids

I did a single row of stitching on both sides of each seam. Clean and simple.

100 quilts for kids

The finished size is about 40” x 40”. This quilt is going to My Stuff Bags.


quilt #3: rainbow stripes

100 quilts for kids

I couldn’t resist sewing up a fun rainbow stripe quilt. The front is all Kona solids from my stash, and I picked up a playful alphabet fabric for the backing. It wasn’t quite wide enough so I added a bright strip of blue. I’m a big fan of breaking up backs this way. It’s easy and adds a nice graphic punch to it.

100 quilts for kids

I used the blue, as well as a little pop of red, for the binding. I did double rows of stitching along each seam, as well as along the blue strip on the back.

100 quilts for kids

The finished size is about 43” x 47”. This quilt is headed to a local NICU.


quilt #4: april showers color block

100 quilts for kids

My next contribution is this cheerful color block pattern featuring a fun print and bold solids. I picked up this print for about $2 a yard (woo!), and originally was thinking I would just use it as a backing fabric. But the more I looked at it, the more I wanted to incorporate it into the front. Maybe it’s because I’ve been desperately hoping for rain (Los Angeles has been hot hot hot), or maybe it’s because it’s just so adorable!

100 quilts for kids

I used this quilt pattern for a baby quilt I’m working on, and I love it! It’s fun and versatile, and works equally well with prints and solids. I did straight stitching as well as diagonal. I love the combination of the two. And of course, I had to do scrappy binding.

100 quilts for kids

The finished size is about 42.5” x 42.5”. This quilt is going to My Stuff Bags.


quilt #5: pop checkerboard

100 quilts for kids

My final quilt for 100 Quilts for Kids is this fun checkerboard. Simple and graphic, with a pop of hot pink. I used a fun polka dot fabric for the backing, and a coordinating pink for the binding.

100 quilts for kids

I also decided to quilt with hot pink thread just to add a little extra pop.

100 quilts for kids

The finished size is about 40” x 40”. This quilt is going to Project Linus.


I had such a lovely time making all of these quilts. It was definitely a push to get them done, but it was well worth it! I hope the recipients loves them as much as I do :)

100 quilts for kids

If you haven’t already, I’d encourage you to hop on over to Quilts in the Queue and take a look at what everyone else made. There are some fantastic contributions, and I’m sure they will bring smiles and comfort to some very deserving children.

100quilts4kids

Have a great week!

xoxo


100 quilts for kids: progress!

The deadline for 100 Quilts for Kids is right around the corner, so I thought I’d share a quick peek of where I’m at!

100 quilts for kids

What the huh??? OK, I might be having a little too much fun. Or, I’ve gone completely insane. Possibly some wonderful combination of the two… I originally planned on making one, maybe two quilts. But as you can see, those numbers have grown. I couldn’t help myself!

To recap, 100 Quilts for Kids is an annual charity quilt drive that encourages quilters to make and donate a quilt to a child in need. This year it’s being hosted by Quilts in the Queue and it runs from August 1st – September 30th (only a few days away, don’t remind me!).

I’ve been wanting to make some quilts for charity for quite a while, so this was the perfect opportunity.

I gave myself a few guidelines:

  1. use as much fabric from my stash as possible.
  2. pick prints/colors and quilt patterns that just make me happy.
  3. finish one quilt before moving on to another. (obviously, I failed miserably at this one).

Anyway, time to get back to it. Wish me luck! Stay tuned for pics of the finished quilts and info on the charities they’re going to.

And hey, if you’re a fast quilter, there are still a few days to get in on the fun! Info and guidelines can be found here.

100quilts4kids

Have a lovely weekend!

xoxo