kid’s clothes week: harem pants

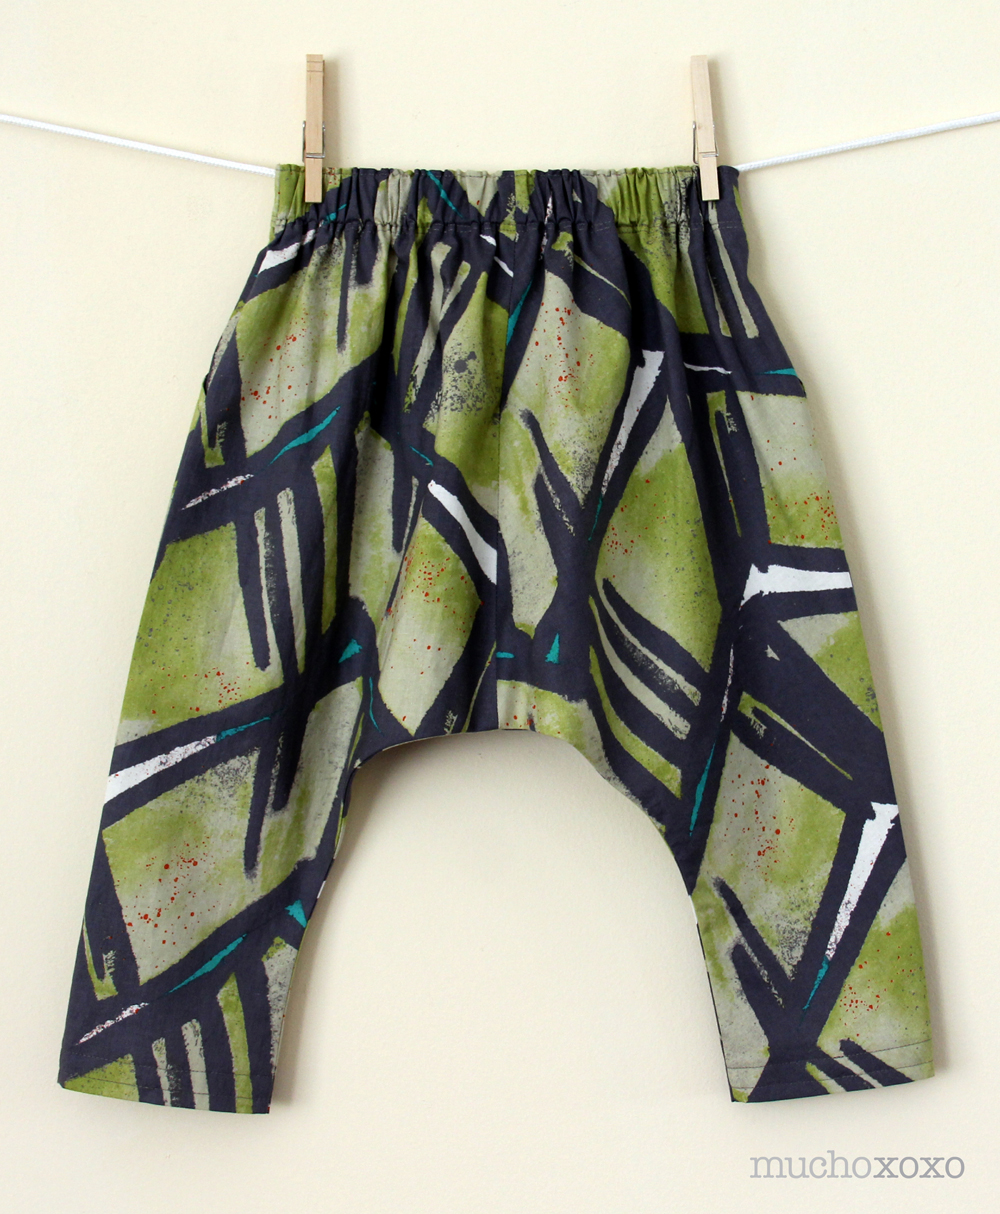
I’m not sure how I feel about harem pants on adults, but they’re pretty cute on the littles. I knew I wanted to make some pants for my nephew and this seemed like a fun option.

harem pants by mucho xoxo

This pattern is from suburbia soup, and it’s just great! It has a few options to play with, which is always fun. After making the pocket version, I’m thinking I have to do the basic version too!

I chose one of my coveted Jay McCarroll fabrics for this because, well, it’s awesome! It has a graffiti-esque quality that I love, but it also feels somehow tribal. Perfect for the little dude man!

harem pant pockets by mucho xoxo

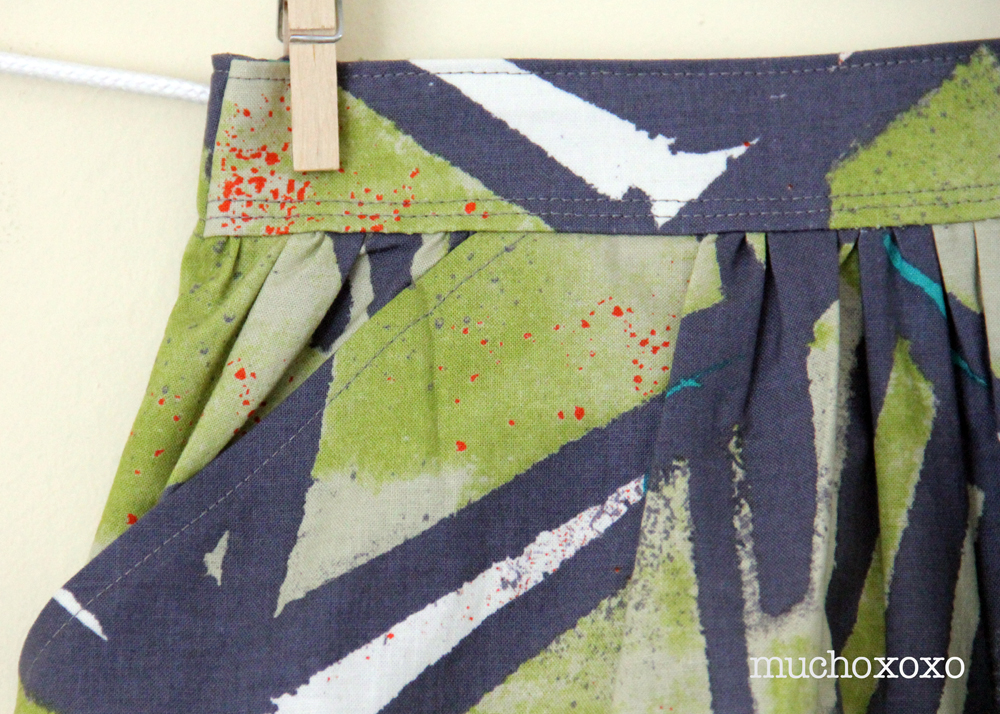
I was a bit unprepared for how much fabric this pattern takes, and I had to make a slight modification to the back by making it two pieces instead of one (just add the seam allowance to the center cuts). But it’s hardly noticeable with this print, yay!

harem pants back by mucho xoxo

I can’t wait to see how these fit the boy. More pictures to come, hopefully :)

***UPDATE***  If you follow Suburbia Soup, you might be wondering where the blog went… I managed to contact Venus and she let me know that her site isn’t gone, just moved. She’s still working out the kinks, but doesn’t have any plans to stop (hooray for that!). I’ve updated the link above, or just click here to stop by. And spread the word, she needs help letting people know she’s moved!  :)
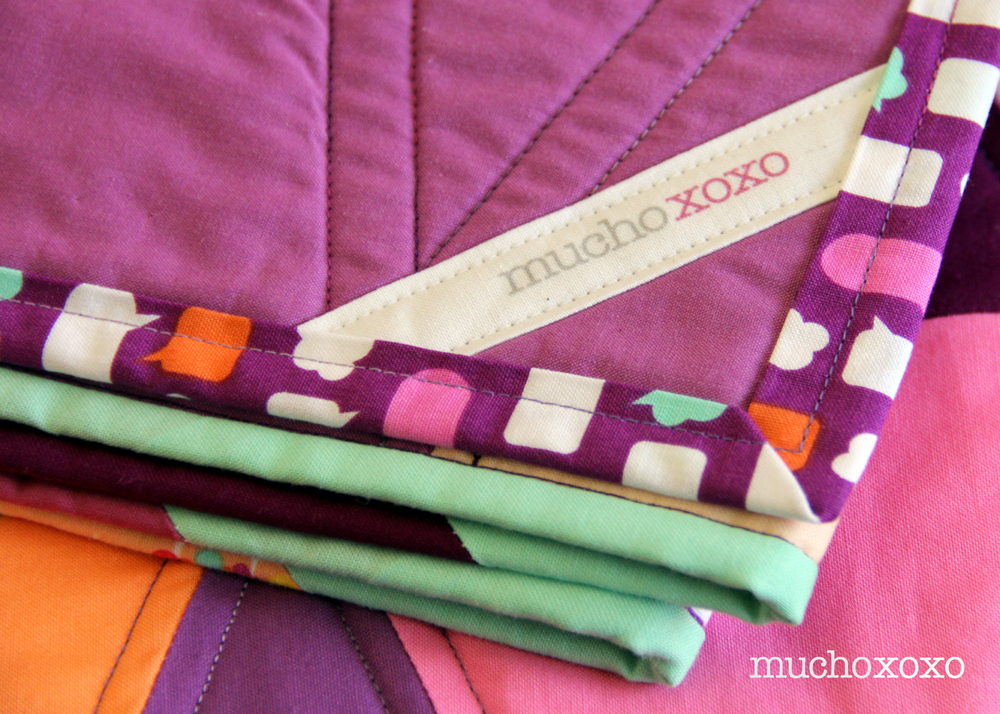
xoxo

kid’s clothes week: little geranium dress

Wow! This week really slipped by, didn’t it? I’ve been having so much fun sewing that I’ve slacked on sharing what I’ve been up to… So here it goes! (I’ll keep it short for now, but I’ll most likely revisit many of these patterns again).

First up, one of the patterns from Made By Rae that I’ve been wanting to try…

geranium dress 1

This is the free version of her wildly popular geranium dress pattern.

It’s tiny, and oh-so-cute!!!

The fabric is Ric Rac Rabbits. I’ve had it in my stash for a while and I just couldn’t resist using it.

muchoxoxo geranium dress2

My gathering skills could definitely use some work, but it’s so cute that I didn’t feel the need to take them out and try again. Oooh! And I finally got the chance to try my buttonhole foot on my sewing machine. And a button sewing foot? I didn’t even know I had that! Am I way too excited about this? Absolutely!!!

I decided to add some little bloomers with my leftover fabric. I used the baby bloomers pattern from see kate sew.

muchoxoxo geranium dress3

They were quick and easy. They’re technically reversible (front to back, not inside-out), but I love the idea of the little bunnies on baby’s bum, in place of ruffles. These would also be cute with a simple t-shirt for less dressy occasions.

muchoxoxo geranium dress4

These patterns were so much fun! I have a feeling that I’ll be making more of both in the future :)

xoxo

it’s kid’s clothes week! hooray!

kid's clothes week

Spring Kid’s Clothes Week is officially kicking off, and I couldn’t be more excited! For those of you who are familiar with it, I’m sure you know why. For those of you who are new to it, it’s a pretty simple and fun idea– for 1 week, dedicate 1 hour every day to sewing for the kiddos in your life. You can read more about it here.

The best part about it is you can do as little or as much as you want, or have time for. And it brings out people of all sewing levels, beginners and rock stars alike. So, just because you’re a newbie doesn’t mean you can’t participate. It’s so fun seeing what everybody does, and I guarantee you’ll walk away with a ton of inspiration!

I participated in the Summer 2013 KCW, but only had time to make one thing– a super cute bubble pocket skirt that I absolutely love. This time around, I’m a little more organized. I have a few things planned out. Potential fabric choices have all been pre-washed. Patterns are all ready to go, and so am I! Now the big question… Where do I begin?

muchoxoxo_kcw

I predict this week will fly by. I’ll be sharing snippets and peeks along the way on Instagram and all of my finished projects right here. If you’re interested in joining in on the fun, you can register here.

Have a great week!

xoxo

radiant orchid quilt: hello triangles!

Can it be? Is my Radiant Orchid quilt finally done?????

radiant orchid quilt front

radiant orchid quilt back

This has been quite a labor of love. And hate. And frustration. And a fair share of cursing. And, well you get it…

radiant orchid quilt When I decided to enter something into the Pantone Quilt Challenge, it was less about winning and more about trying something new. And boy did I!

This was a fairly big step out of my usual color palette, and I have to say it was a fun little trip! I originally thought I would use all solids, but as I started planning my quilt, my little stack of Moxie by Erin McMorris peeked out of my stash and said “hey Amanda, can we come out and play?” I just love the colors and playful prints (you might recognize a few from my bubble pocket skirt). It’s hard not to smile when you look at them. Which is a good thing, because we were about to spend A LOT of time together! I added a few more colors to compliment the prints and radiant orchid hues I had already picked. I also found some beautiful variegated thread to use for the quilting and binding. radiant orchid quilt materials When it came to deciding on a pattern, my only requirement was that I had to try something new. I finally narrowed it down to two options– a triangle quilt, or something more simple and modern. I went back and forth on this and finally decided, why not do both! radiant orchid quilt I’ve never made a triangle quilt and I was looking forward to giving it a shot. I used a dear jane template to cut the 231 triangles, and it actually went surprisingly fast. Assembling the triangles was a different story. It was definitely a struggle in the beginning… Why won’t my pieces work? What am I doing wrong? Why can’t I figure this out? Maybe I should just give up!… Yep, it was a bit of a roller coaster for a while. If you’ve made one, you probably know what I’m talking about. I learned a few things along the way, but that’s a post for another time.

radiant orchid quilt

It took a while, but once I got the hang of it, things went smoothly. And with every successful intersection, I celebrated a small victory! radiant orchid quilt By comparison, the back came together pretty quickly. I love the contrast between the more traditional front and the modern asymmetrical back. I chose to quilt only the diagonals, and I love how the diamond pattern looks on the back. And the variegated thread is beautiful! radiant orchid quilt I also decided to try scrappy binding for the first time. Originally I was going to piece the strips randomly but I decided I wanted to be a little more deliberate with the placement (OCD much?). I really didn’t make things easy on myself. I absolutely spent too much time on this. I love how it looks but next time I think I’ll go for random. radiant orchid quilt binding Looks good enough to eat, doesn’t it? And I even had a label that matched the Radiant Orchid perfectly! radiant orchid quilt label Binding the quilt used to be my least favorite part, but with every quilt I gain a little more confidence. If you’re still struggling with your binding technique, here’s a quick video tutorial that I find very helpful. radiant orchid quilt This project has been quite an experience. It tested my patience. It tested my skills. It even gave me nightmares. Seriously. But in the end I’m very happy with how it turned out.

radiant orchid quilt

Quilt details:

  • Finished size- approx. 77 x 54 inches
  • Quilt design by me
  • Fabric- moxie print and an assortment of cotton solids (kona cotton, hawthorne hues and alissa haight carlton)

If you’re curious what other people have done for the challenge, you can visit the 2014 pantone quilt challenge: radiant orchid flickr group or take a look at the entries at either of the links below. There’s some really nice work!

Linking up with on the windy side and play crafts 2014 pantone quilt challenge Ok, time to curl up with my new blanket!

xoxo

2014 pantone quilt challenge – let’s go!

I don’t know about you, but I’m a bit obsessed with all things Pantone. Coming from a design and art direction background, it’s become part of my daily life. So it should come as no surprise that I’m always excited to find out what Pantone’s color of the year is going to be. Does that make me a bit of a color geek? Totally. But it’s a badge I wear with pride!

This year, the winning color is Radiant Orchid

Pantone Radiant Orchid

When I found out about the Pantone Quilt Challenge, it seemed like a fun way to celebrate the color of the year, and challenge myself to try something new. I’ve never entered a quilting challenge… Rules? And a timeline??? Ohhh boy, this could get interesting!

2014 pantone quilt challenge

The challenge is being hosted by Adrianne from On the Windy Side and Anne from Play Crafts. If you’re unfamiliar with their blogs, do yourself a favor and go check them out!

Radiant Orchid is a little out of my color-comfort-zone, so I’m looking forward to pushing myself. I ordered a fabric swatch to take with me on my hunt for coordinating fabrics. I got mine on Amazon but they’re also available through the Pantone site. I haven’t decided on a pattern yet, but I’ve already told myself it has to be something I haven’t done before.

Radiant Orchid Swatch

If you’re a quilting color geek like me, get in on the fun and enter! (Follow either of the blog links above for more info). And if quilting isn’t your thing, why not use Radiant Orchid as inspiration for a fun project of your own! I have a feeling this color will be popping up in a few things I have planned. But first thing’s first, it’s time to get going on this quilt!

xoxo

a toddler backpack for my favorite kiddo

Toddler BackpackIt’s no secret that my nephew is the inspiration for many of the things I make. I made him a quilt last year for his first Christmas (one that I take great joy in seeing him sleep with and drag around now), and I knew I wanted to continue the tradition and make him something special this year.

Toddler BackpackI’ve had my eye on the toddler backpack pattern from made by rae and this was the perfect opportunity to try it! The pattern was easy to follow, and it all came together without too much trouble (which is good, because as with most projects, I waited until the last minute to get started).

I made a few additions, including a flat front pocket and gathered side pocket.

Toddler BackpackI also added zipper tabs. I love this detail, and I predict they’ll be helpful for little hands to hold on to when learning to use the zipper.

Toddler BackpackTwo inside pockets (the lower one is divided in two).

*I turned the backpack inside-out to give you a better look at interior :)

*I turned the backpack inside-out to give you a better look at interior :)

Fabrics: I used Retro Crosshatch, Pezzy Print and a black cotton bottom-weight, all from my stash. Feels great to finally put these fabrics to good use!

I added interfacing to the exterior and lining fabrics to help hold its shape. I’m glad I did this, it was worth the extra effort for sure.

Toddler BackpackConfession: I have never used piping, so I decided not to risk it this time. I love how it looks even without it, but I’ll definitely have to try it next time.

Toddler BackpackAt 19 months, he’s just big enough for this, and it will be a great size for him for some time. It can easily hold everything he needs for school/daycare, a trip to the park, or a night at the grandparents’ house.

Toddler BackpackI didn’t actually get a good picture of him wearing the backpack. The minute he opened it, it was on and he was running around the living room quite happily. That is, after he was done playing with the box!

Toddler BackpackSeriously, how cute is he?!?!

xoxo

bubble pocket skirt

I’ve had bubble pockets on the brain lately. So I finally decided to do something about it. And just in time for Kids Clothes Week!

bubble pocket skirt

I decided to make my own pattern for this, and I definitely tried a few things before I figured out what I was doing. All in all, I think it turned out pretty well. Hopefully the recipient likes it as much as I do!

bubble pocket skirt

Btw, how cute is this fabric from Erin McMorris? I’m kind of obsessed with it right now. I’m sure it’ll find its way into some other projects. I’m thinking, maybe the lining of an iPad case…?

bubble pocket skirt

I couldn’t resist making the trim out of the “talk talk” fabric that I used for the pockets.

bubble pocket skirt

These roomy, gathered pockets are perfect for stashing toys, seashells or little love notes.

test patterns

A few of my test runs before I jumped in for real (good, bad and ugly). I’m really glad I did this. I’ve never made my own pattern, so this was a fun experiment for me. Also incredibly helpful to see how my sketch, and assumptions (some of which were surprisingly wrong), translated to the real thing.

Next stop on the bubble pocket train… A bubble pocket maxi skirt for me!

xoxo

a happy little rainbow skirt for skirt week!

What do you need to make a happy little rainbow skirt? Start with a colorful stack of fabric strips that you can’t bring yourself to toss, add a healthy dash of patience, and presto! Ok, there are a few steps I left out, but you get the idea. I’ve been wanting to make this forever, and Skirt Week presented the perfect motivation to finally do it.

I’m pretty pleased with how it turned out. And, it made the Top 10 for children’s skirts. Woo! There were some great entries, and I had a ton of fun!

Girl's Rainbow Skirt

Just look at all those delicious colors! It’s no wonder I couldn’t get rid of them.

Rainbow Fabric Strips

Even the scraps are happy!

Rainbow Fabric Scraps

Maybe one of these days I’ll make one for myself :)

xoxo